Creating a Course (Canvas)
The first thing you'll need to do in order to create a Catalog Listing is to create the course in Canvas.
-
Navigate to Canvas for FSU Learn and log in.
-
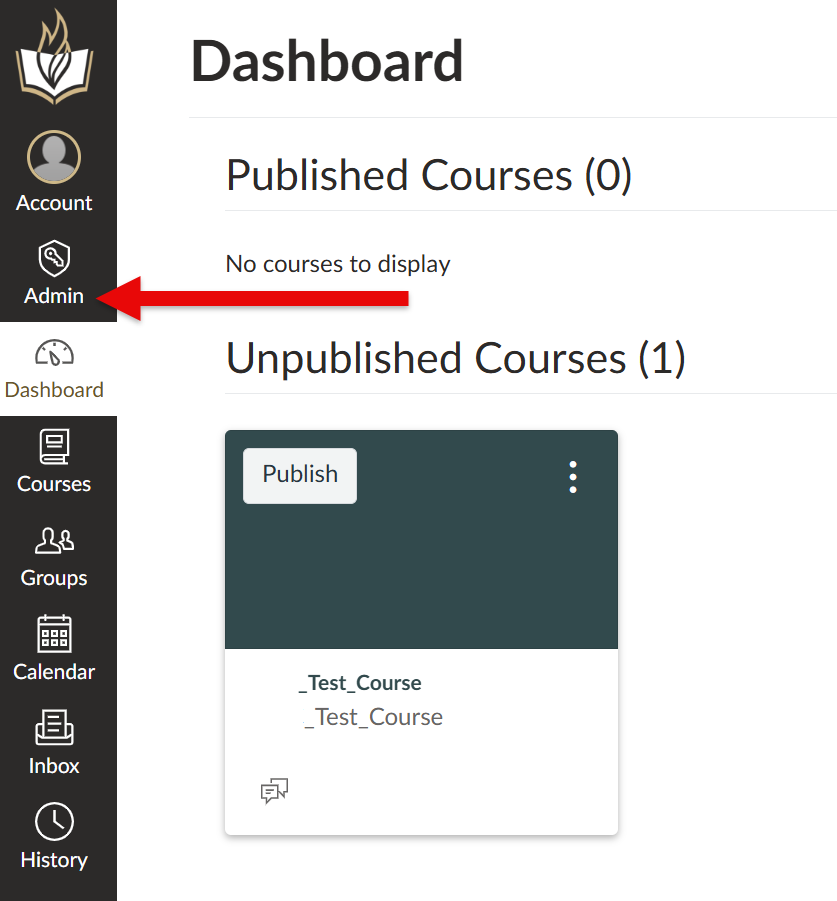
Select Admin on the left-hand global navigation.
-
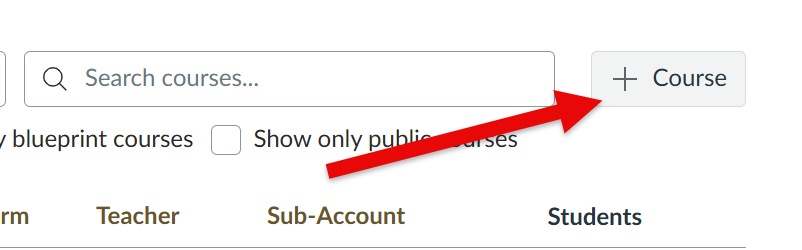
You will land on the Courses page. At the top right of the screen, select +Course,
-
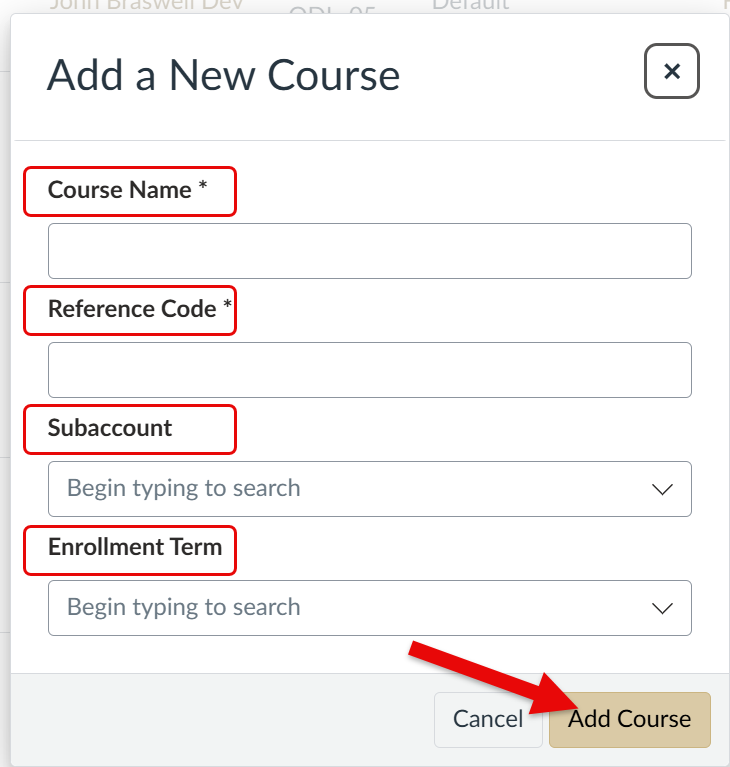
Fill out the Course Name, Reference code, Subaccount, and Enrollment Term information. Once finished, select Add Course.
-
Now it's time to build out your Canvas Course. This can be done via a SCORM file or manual entry. If the course building is to be done at a later date, then you may proceed to create a listing. If you are offering a series of courses in a single listing (a program), repeat the above for each course in the program. Please ensure that your listing will not go live until the course(s) are prepared and published.
Creating a Listing (Catalog)
-
Navigate to Catalog for FSU Learn and log in.
-
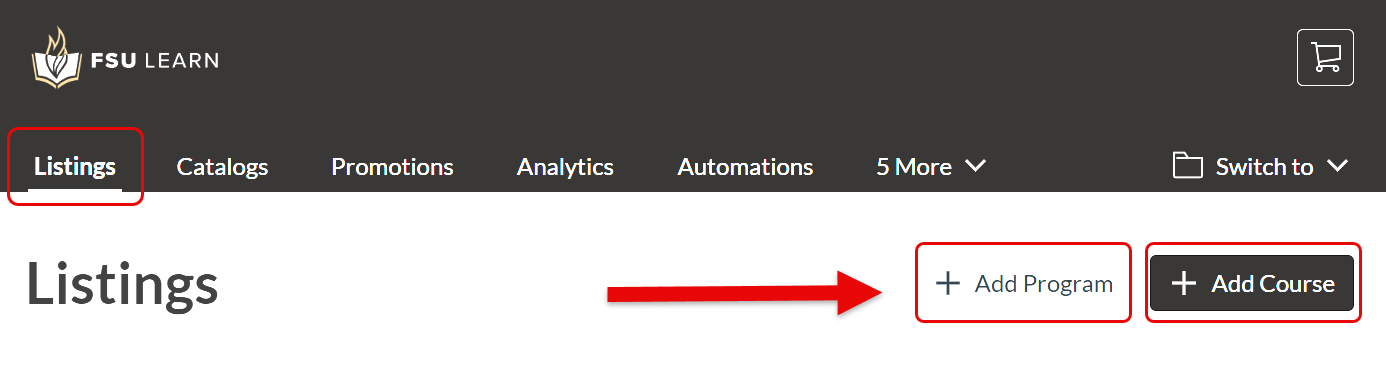
Go to the Listings tab and select either +Add Program (for a listing with multiple courses) or +Add Course (for a listing with a single course).
-
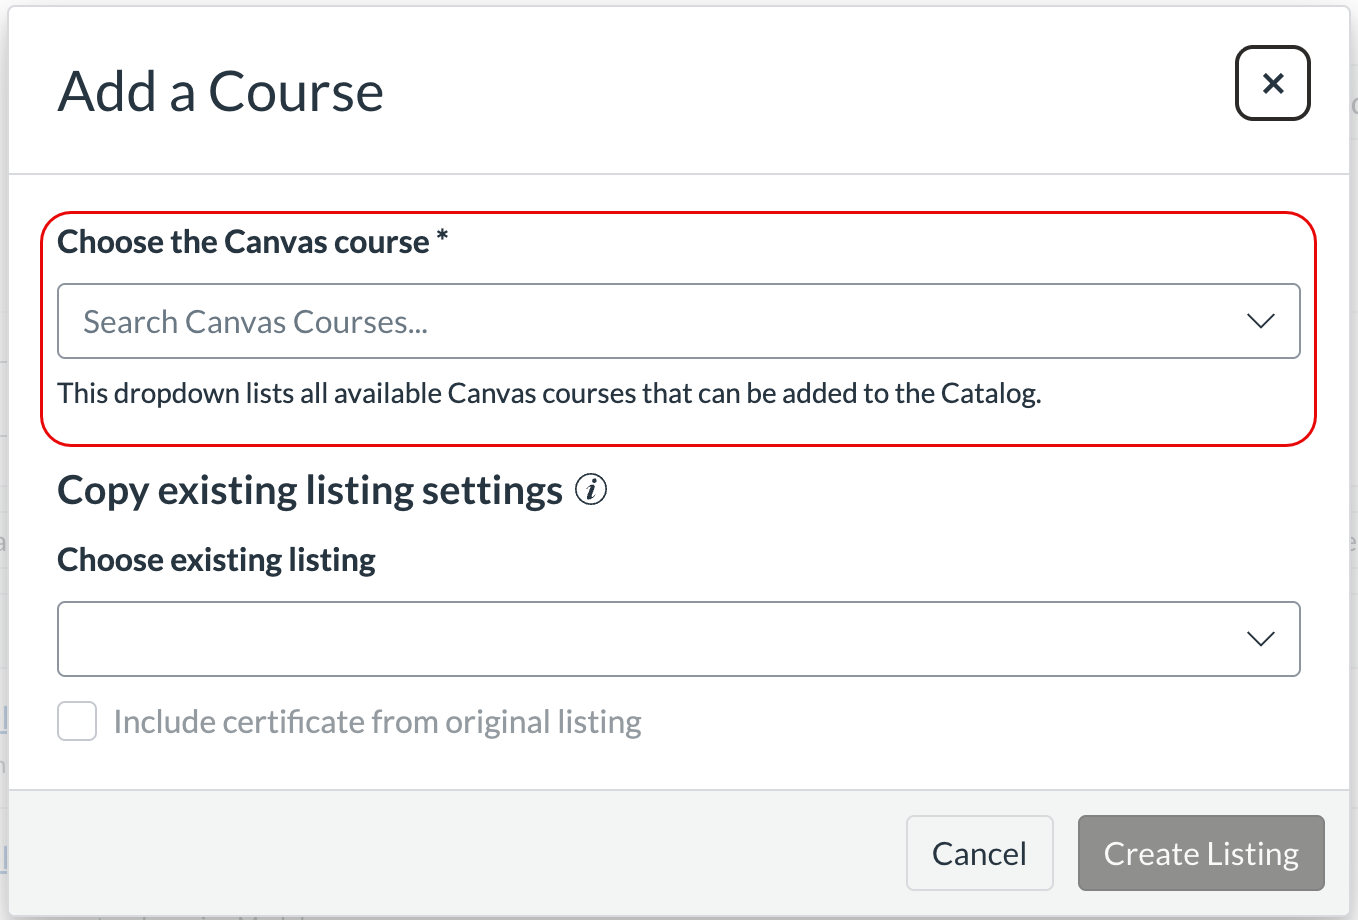
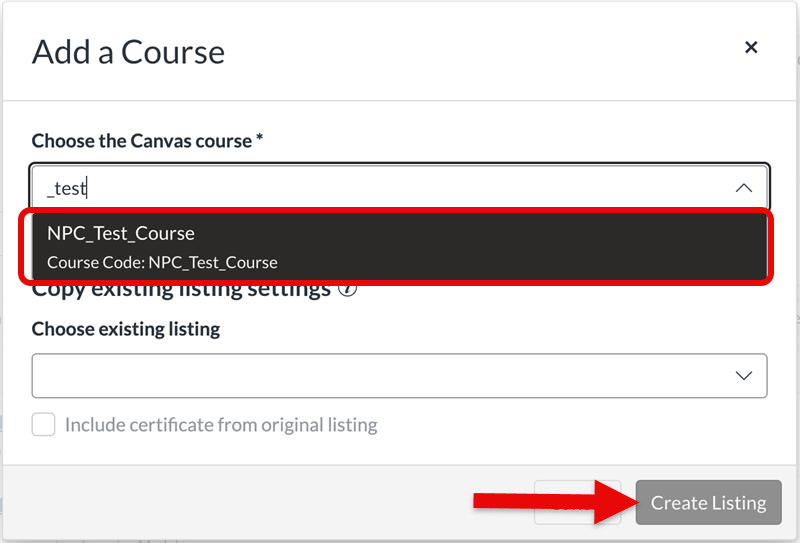
For +Add Course, you'll need to select your Canvas Course from the dropdown menu or copy an existing listing. For +Add Program, proceed to step 5.
-
Once you've found it, select Create Listing.
-
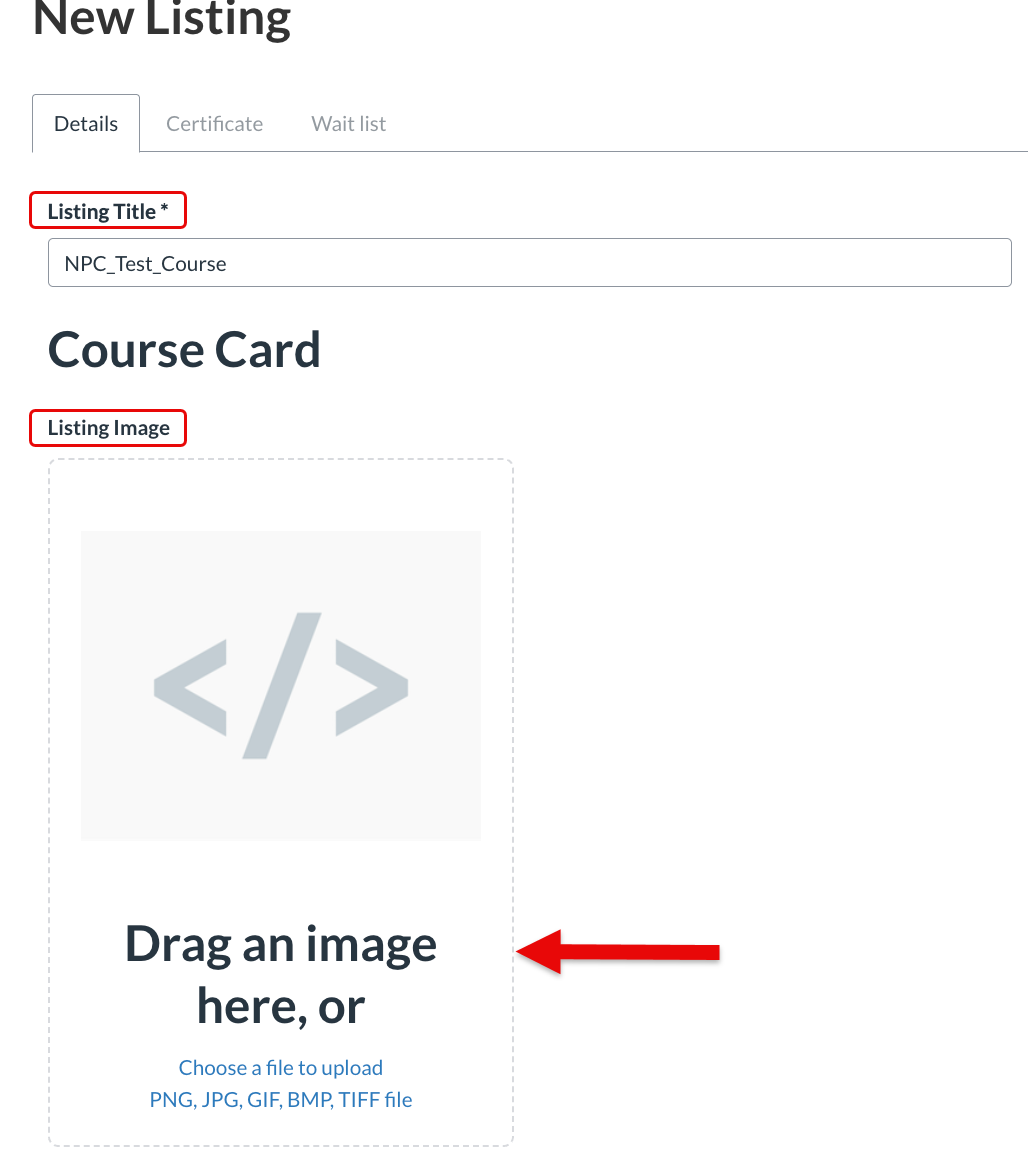
Now, you'll create the listing. The course title will populate for the Listing Title, which you may change. (If you select +Add Program, this will be blank.) Beneath the title, you'll design your Course Card, and may drag and drop or select the specified area to upload an image.
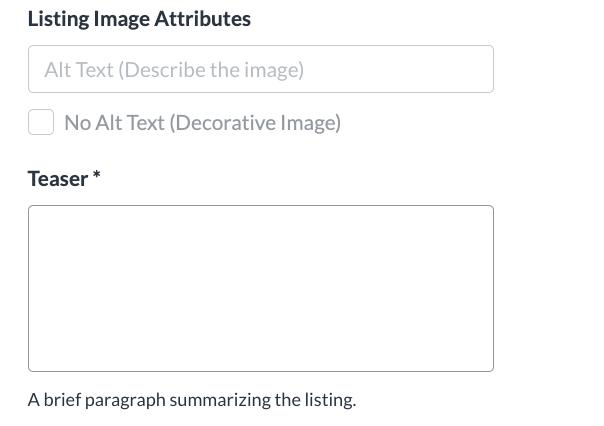
You'll be able to add alt text and a required Teaser, which will be the public-facing course description on your card.
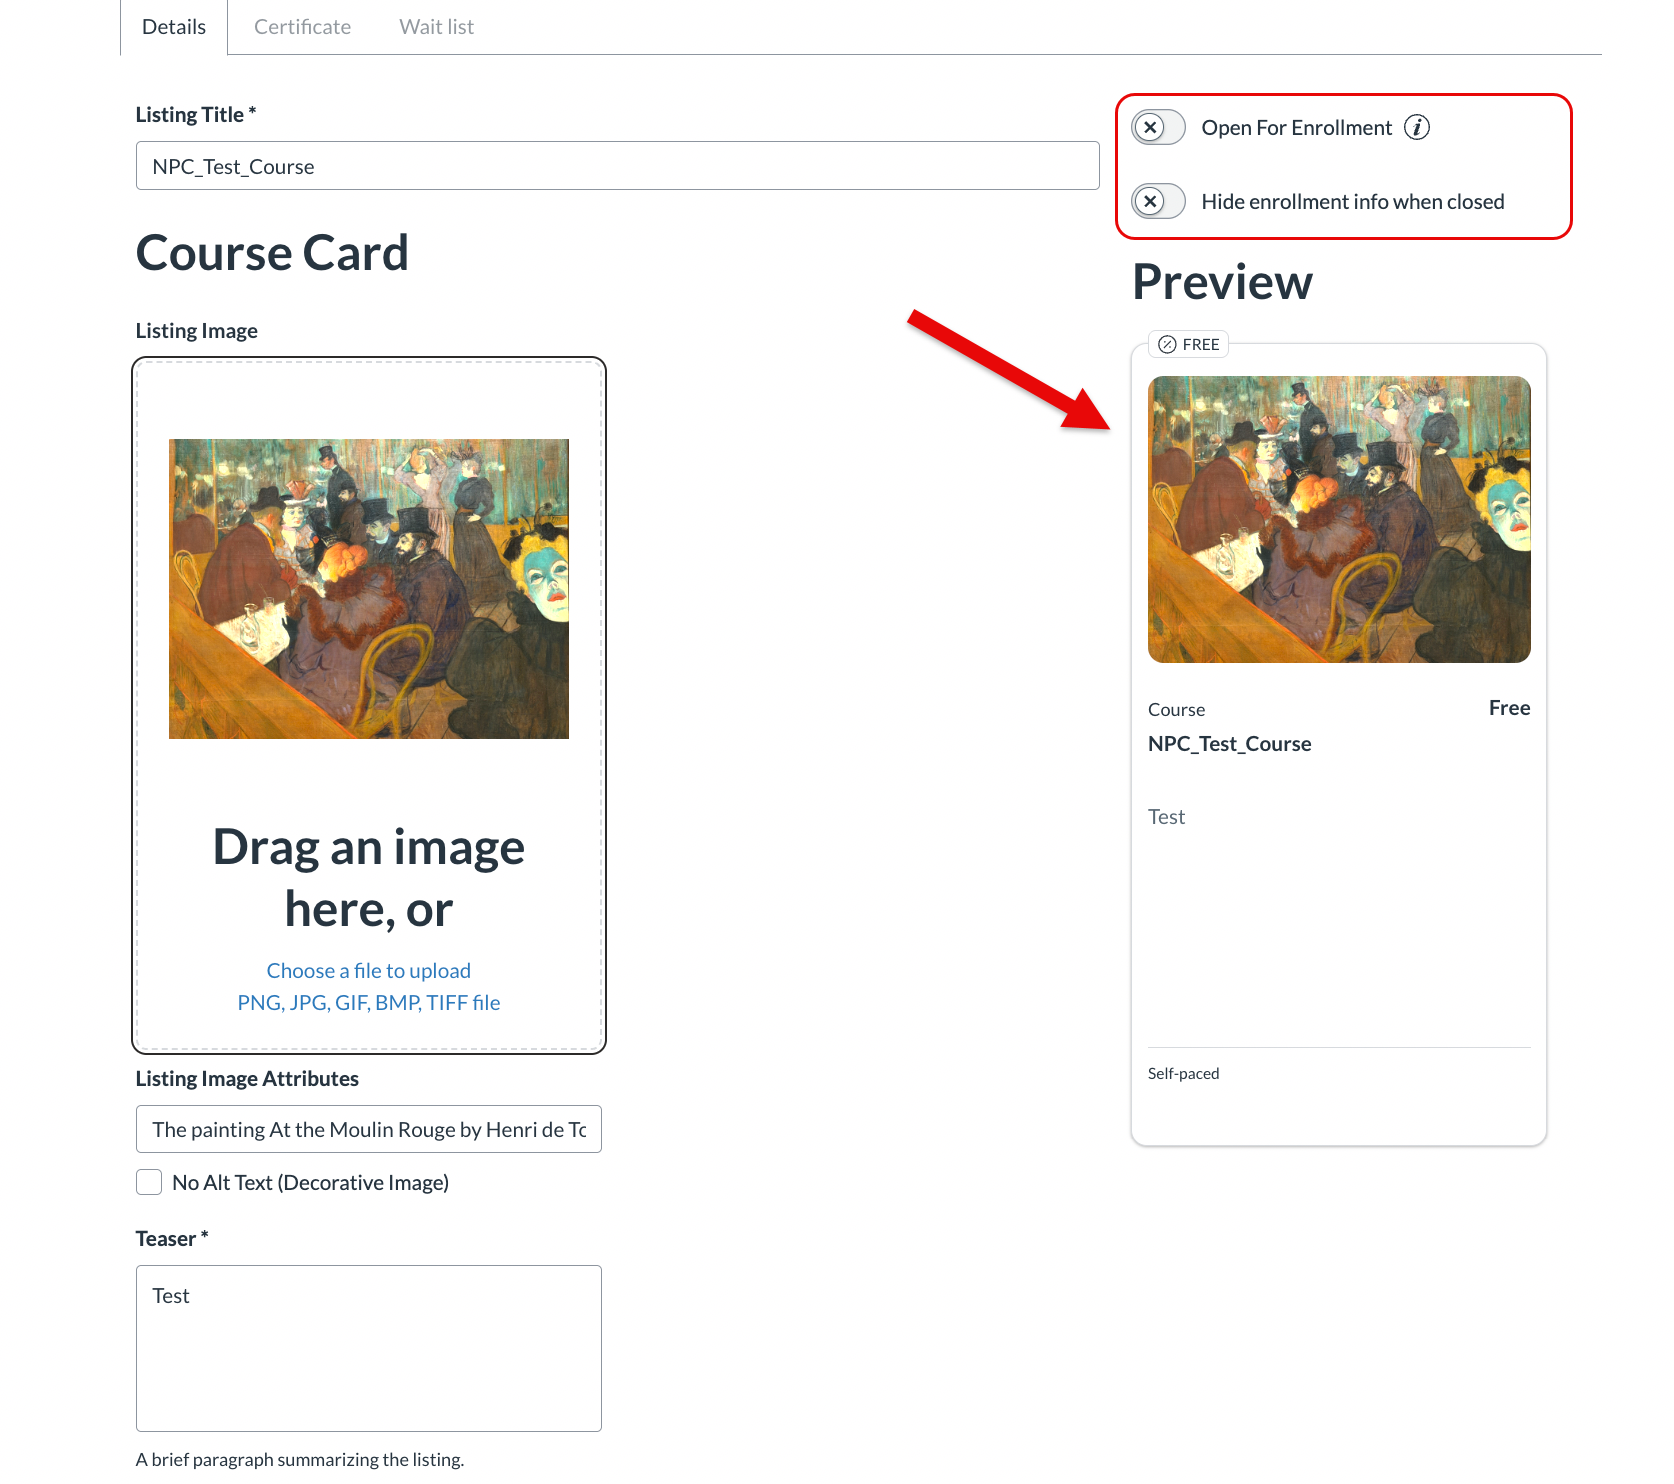
The preview on the right-hand side of the screen will update in real time. Above it, you will see two sliders that toggle enrollment on/off and whether enrollment info should be hidden when enrollment is closed.
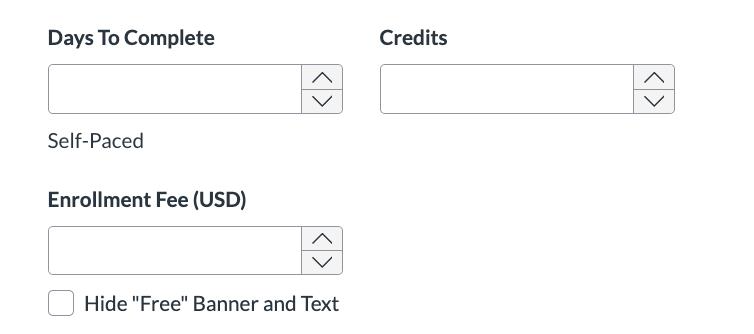
Then you'll set the price in USD and the time students have to complete the course.
-
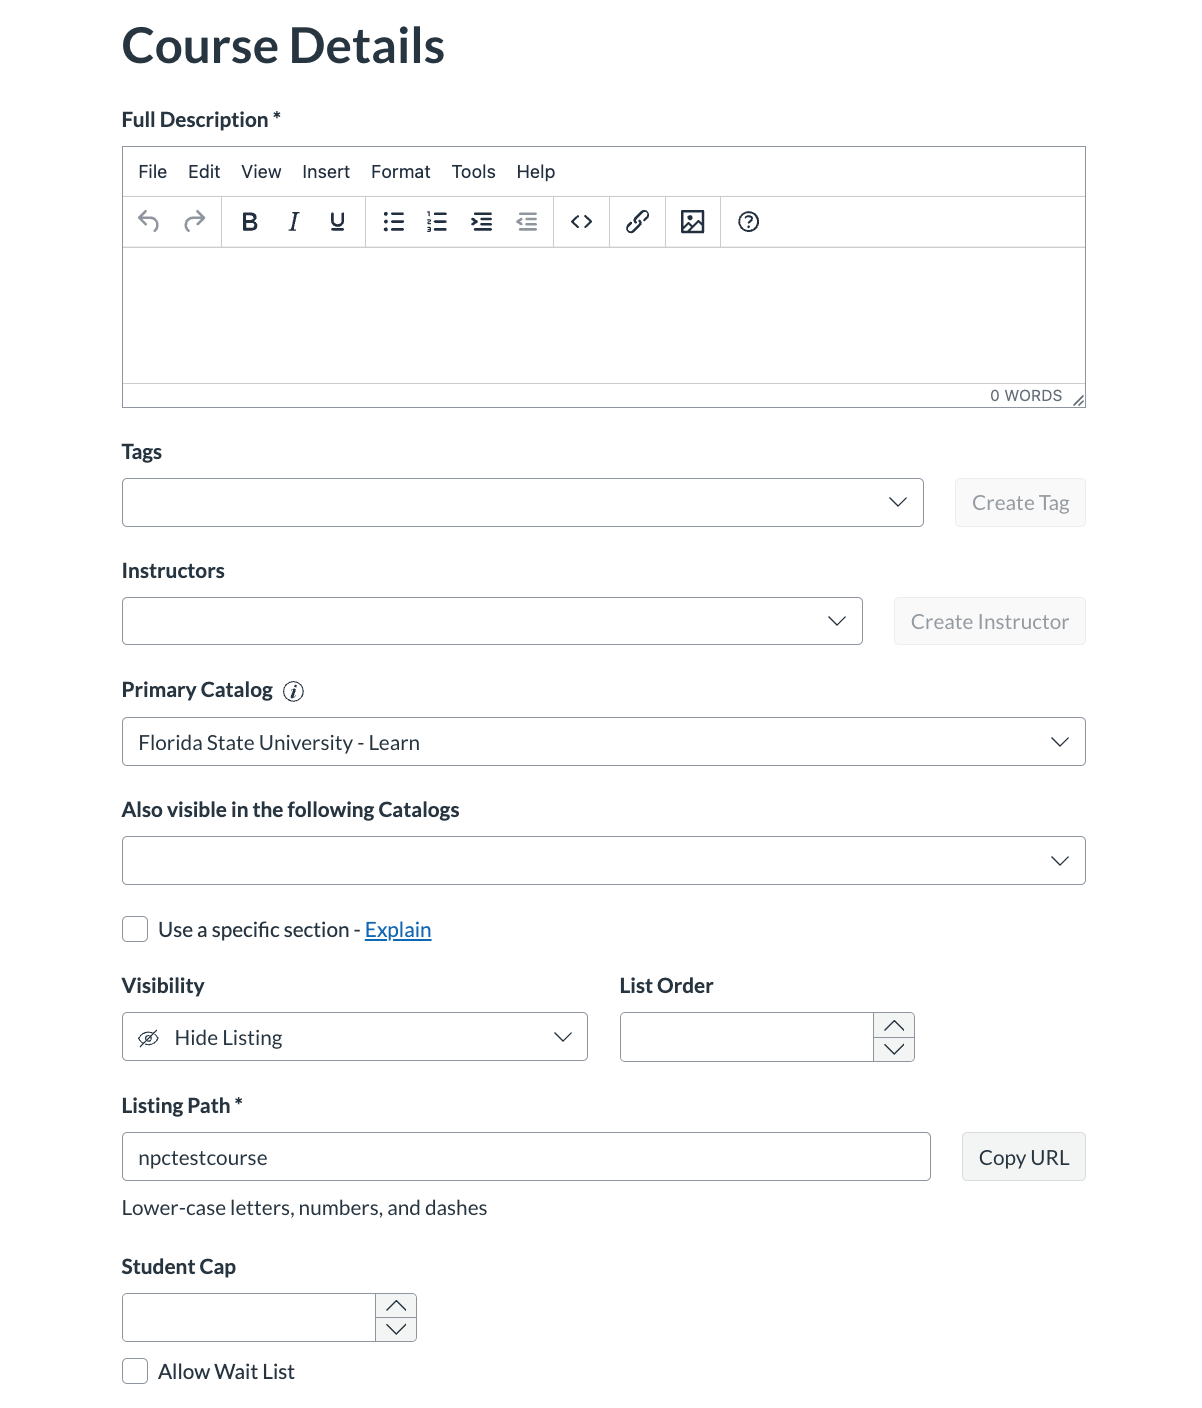
Now you'll fill in the Course Details section of the listing. This is where you'll list the full description and decide whether to show visibility, whether there's an enrollment cap, etc.
-
Once this is filled out, you'll select Create.
-
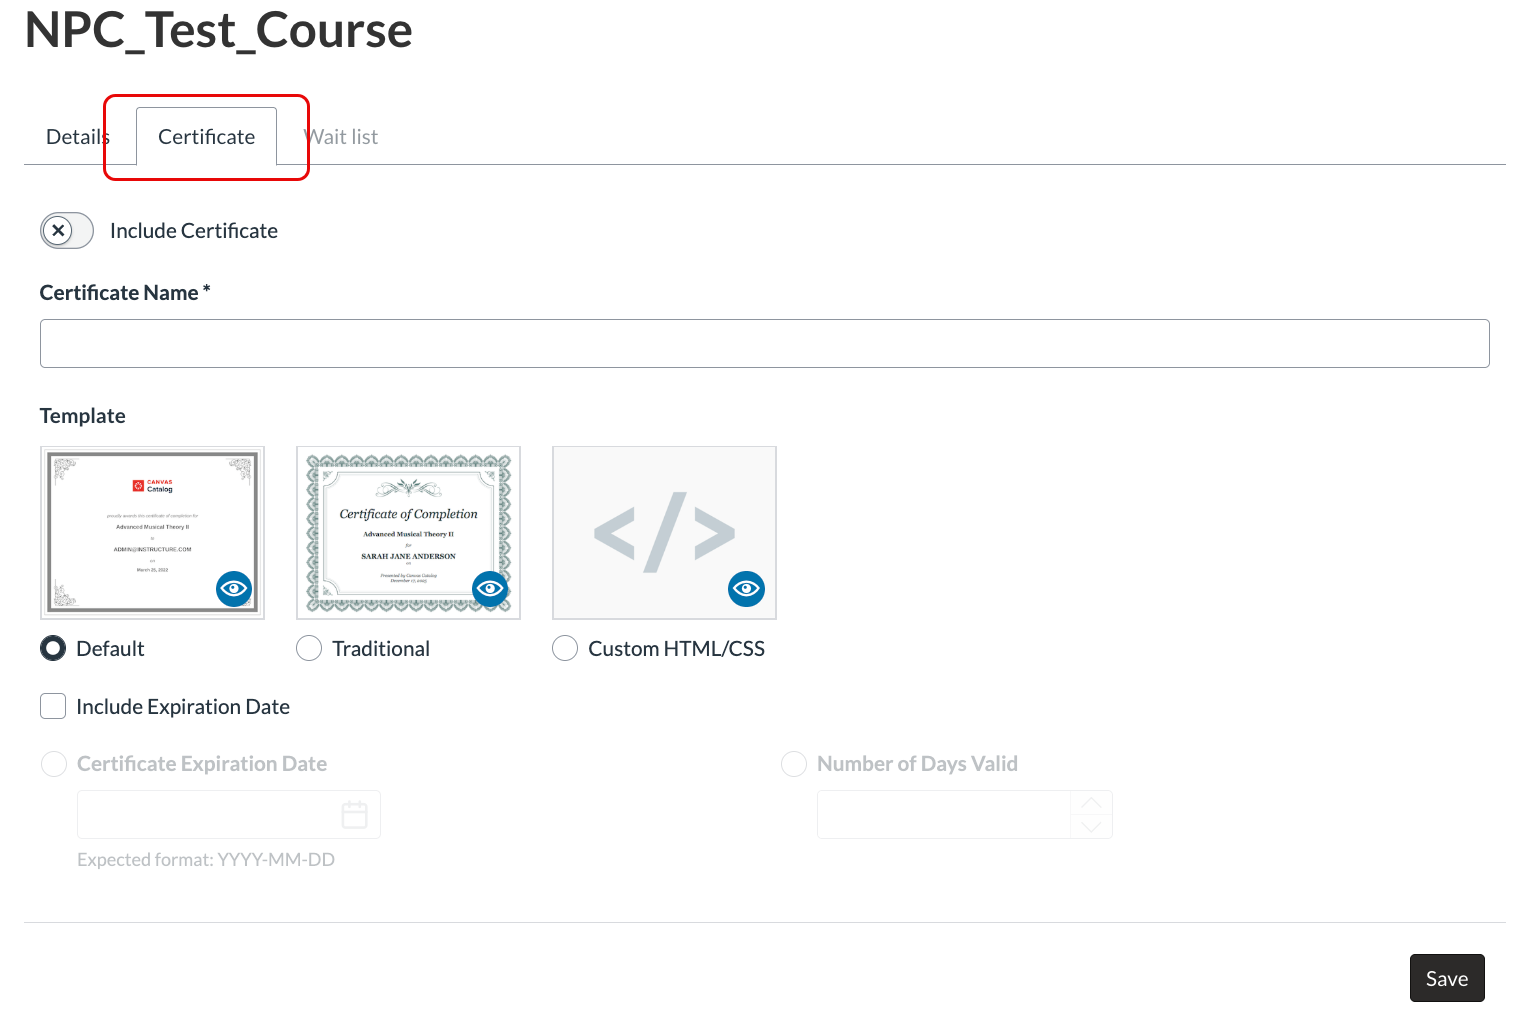
Now your listing is created. You'll have the option to create a Certificate for learners who completed the course via the tab at the top of the page, and you can do so at any time.
Creating a Badge (Parchment Digital Badges)
-
Navigate to Parchment Digital Badges and log in using your FSU Learn credentials.
-
On your Issuer page, select Create badge.
-
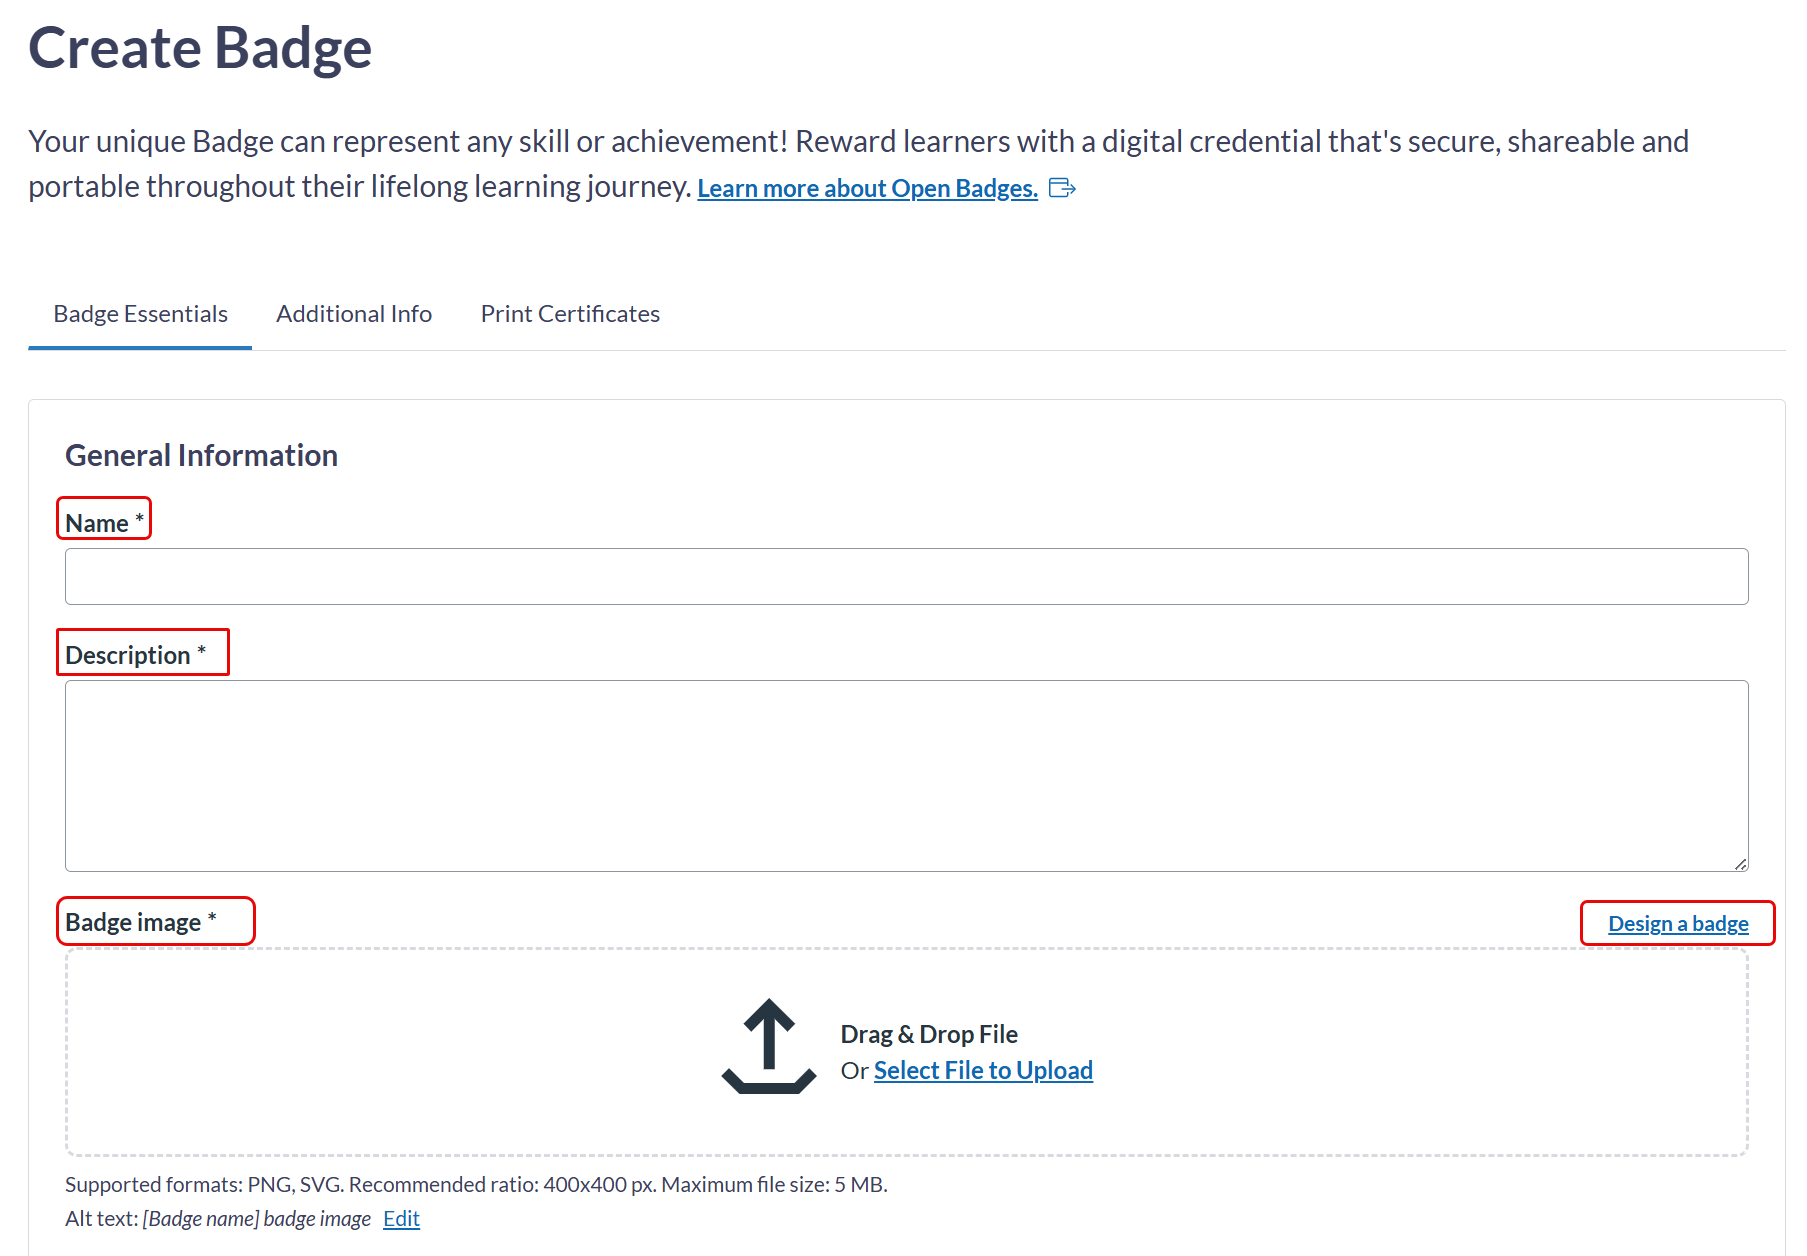
This is where you'll fill in some basic details, such as the badge name, description, and upload a badge image. You may also use the design-a-badge feature to create one using native templates.
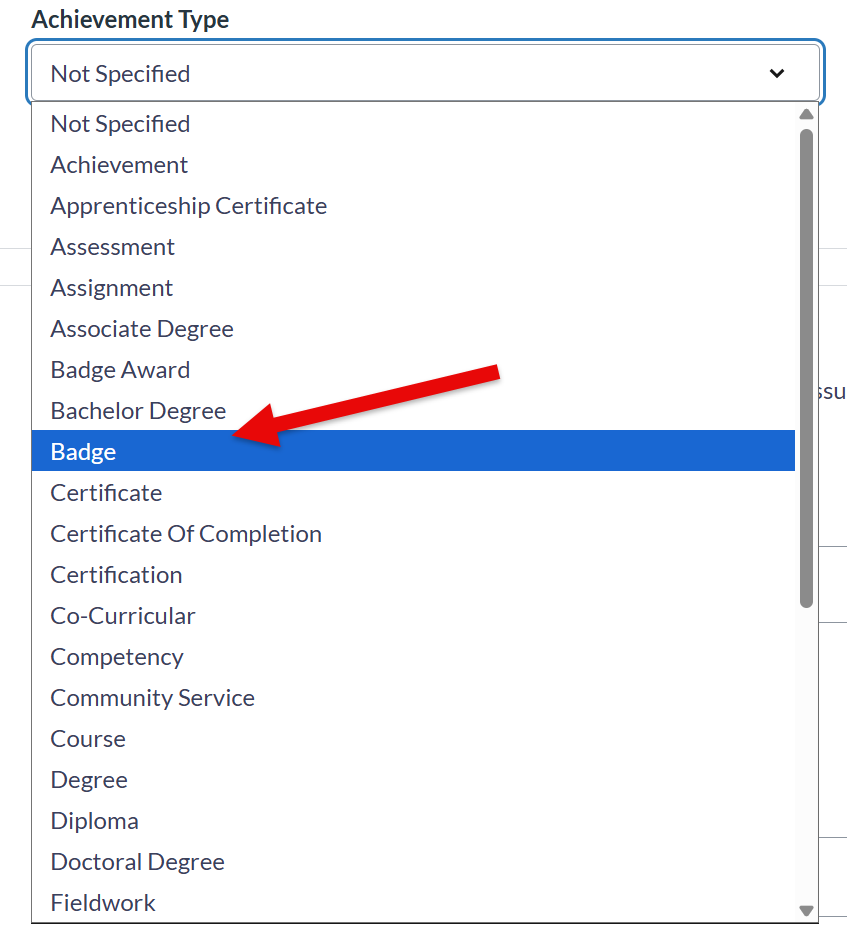
You can also choose the Achievement Type that the badge represents. If unsure, you may choose Badge.
-
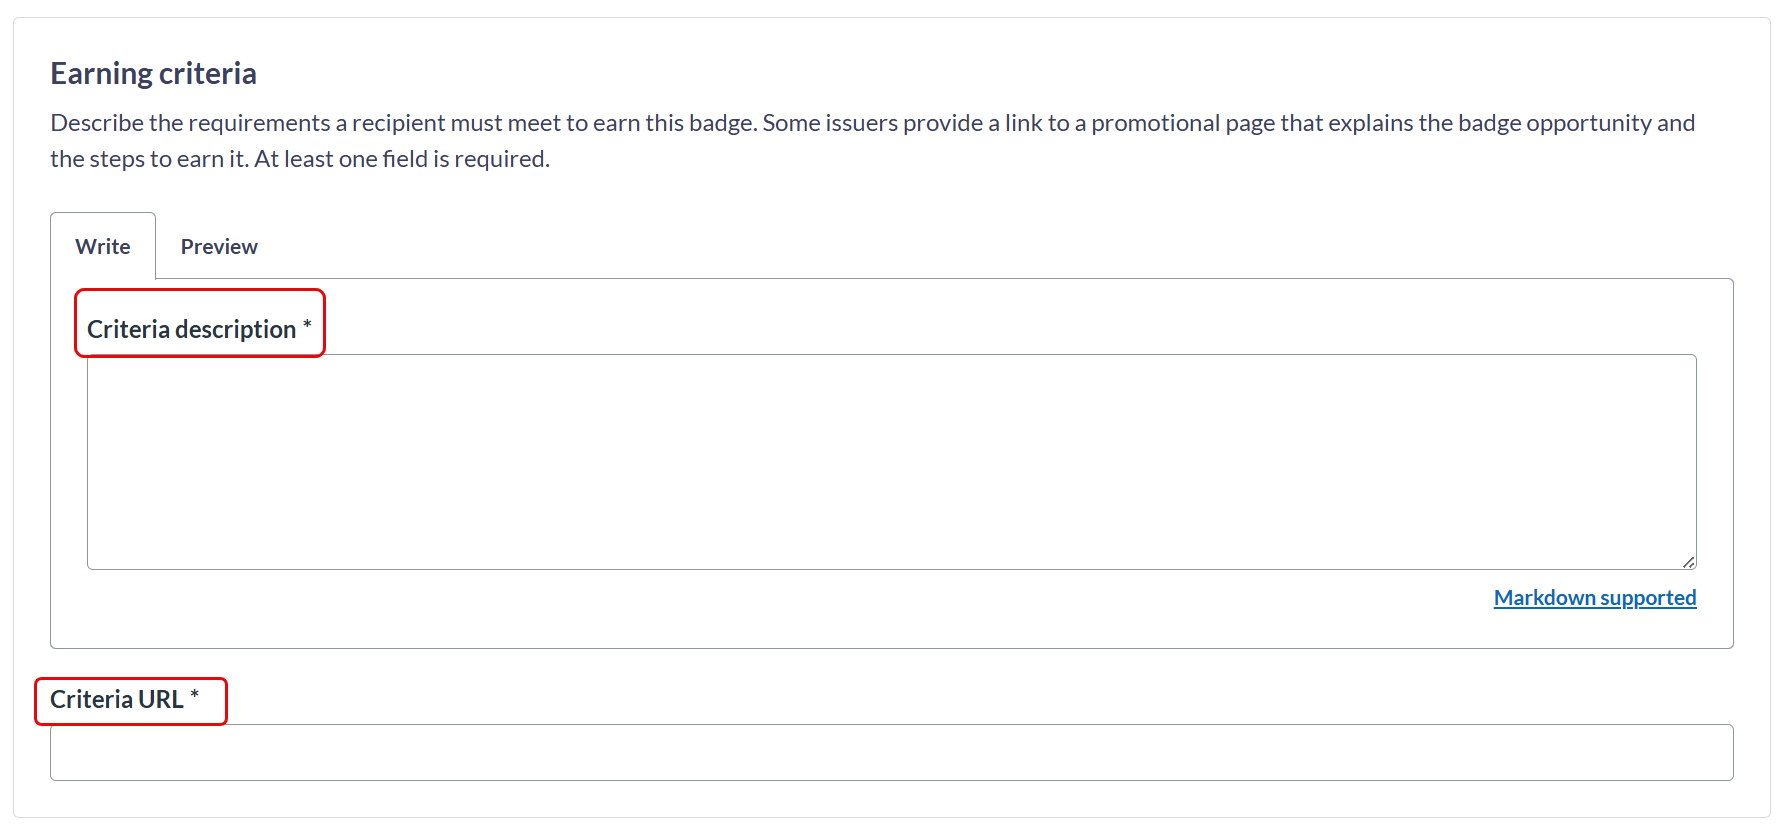
Next, you'll describe the earning criteria. Traditionally, the learner completes a final assessment in their Canvas Course to earn the badge, which you would describe in the Criteria description, and in that case, the URL linking to the assessment would go in the box for the Criteria URL.
-
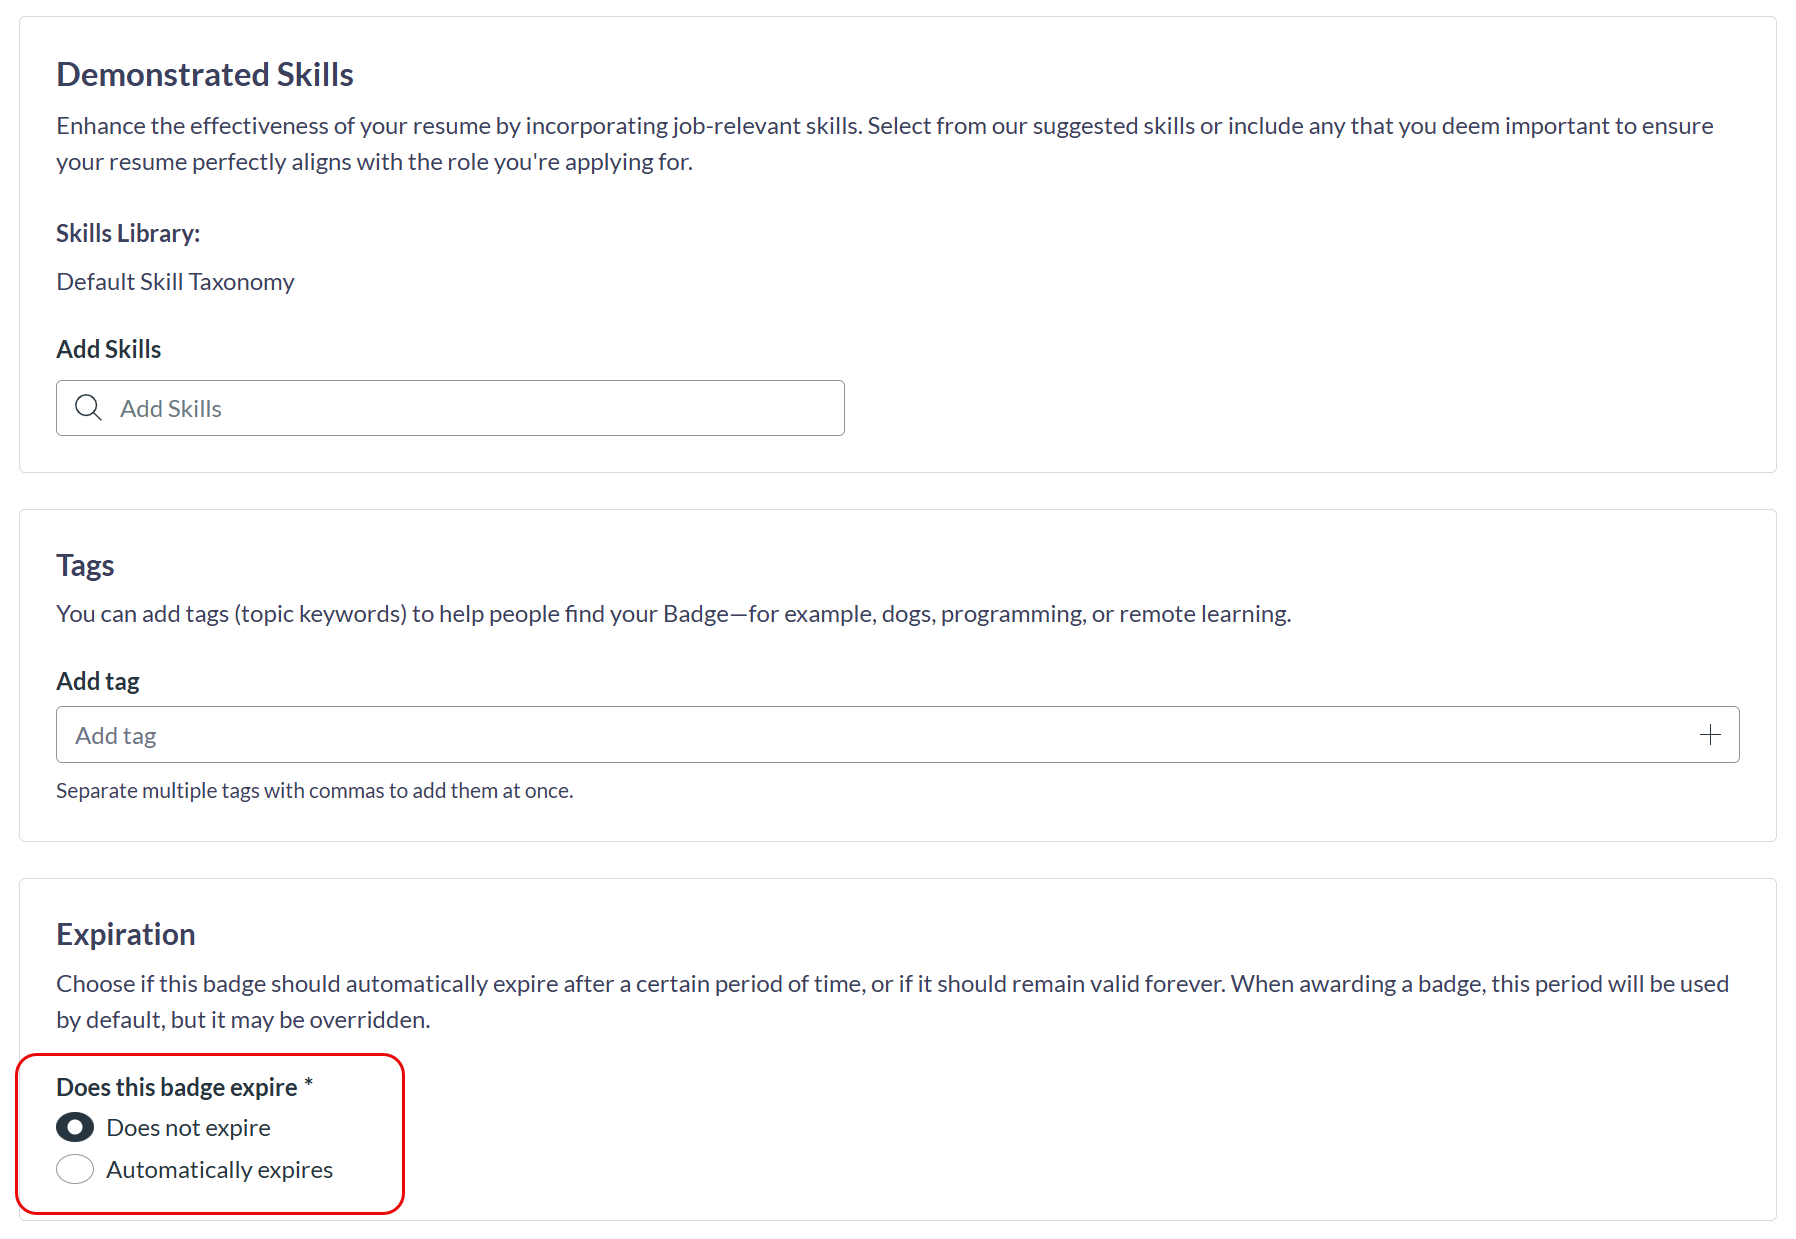
You may list associated skills the badge represents, and add keywords that help people find your badge. The most important bit here is the expiration, which is set to never expire by default.
-
When finished, select Create badge.
Now your badge is created!