


 2054
2054
This guide will walk you through the essential steps for setting up and managing your proctored exams in Canvas using SmarterProctoring.
Key Benefits for Your Course
- Secure Canvas Integration: Access SmarterProctoring directly from your Canvas course menu for a simple, streamlined setup.
- Quick & Proctored Exam Import: Easily import your Canvas quiz details into a locked, secure testing environment.
- Automatic Roster Sync: Student rosters update automatically, ensuring accurate and secure access control.
- Live Proctoring for Maximum Security: Every session is monitored by a live proctor through the student's screen, preventing cheating and ensuring academic integrity.
- Comprehensive Monitoring & Reporting: Review live session recordings, flagged incidents, and detailed reports from your dashboard for complete oversight.
Requesting Access
For use in the Spring 2026 term
FSU introduced SmarterProctoring for use as a live-proctoring solution as of the Spring 2026 term. You will need to request access via the Testing Center.
- Request Access: Visit Instructor Request to Enable SmarterProctoring and login with your FSU credentials to submit the form for each course desired.
- Note: If you intend to cross-list course sections, it is a best practice to perform the cross-listing first, then request SmarterProctoring access.
- Note: If submitting a request for a cross-listed course, please only submit one form for the primary section; the installation will automatically be applied to all cross-listed sections. If submitting a request for several sections of the same course and you choose not to cross-list, please submit a request for each individual section.
For use in Summer 2026 and later
Beginning Summer 2026, SmarterProctoring will be active for use in any Canvas course site, regardless of course modality. Instructors will no longer be required to submit a form to the Testing Center for approval. In order to use SmarterProctoring, you may add the SmarterProctoring option to your Canvas Navigation links from the list of available applications.
Faculty Training
-
FSU Faculty training webinar hosted by SmarterProctoring - January 23,
2026 (33:51)
Password to access: rM@hb7j!
Getting Started in Your Canvas Page
- Log in to your Canvas account: Go to your Canvas login page and login with your credentials.
- Navigate to your course: From your Canvas dashboard, select the course for which you want to set up proctored exams.
-
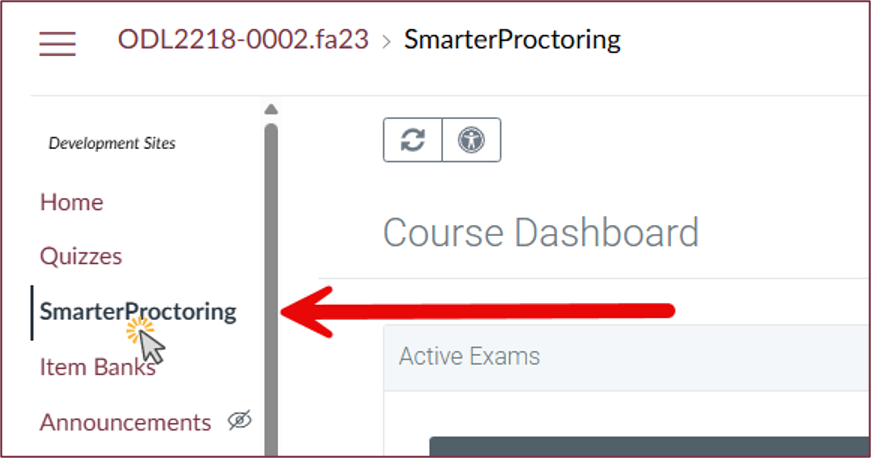
Access SmarterProctoring: In your course navigation menu
(the left-hand sidebar), click on the
SmarterProctoring link
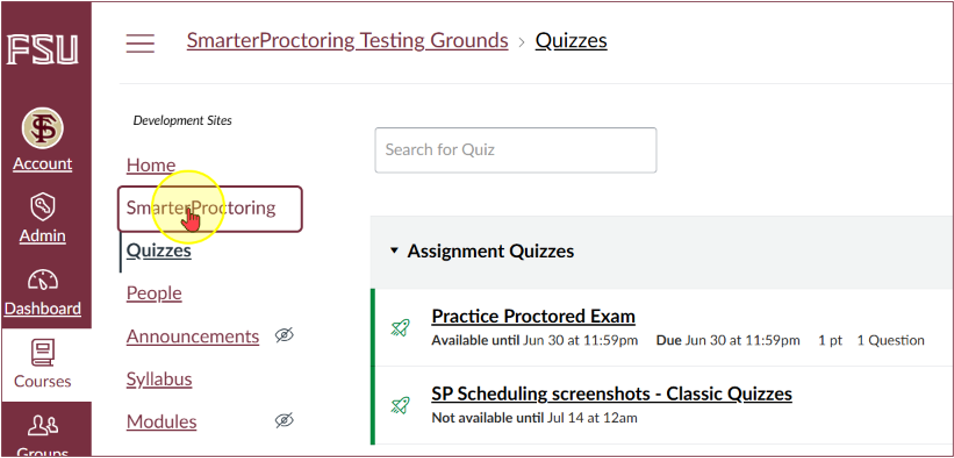
- First-Time Access: The first time you click this link, you may be prompted to Authorize the application. Click Authorize and then complete any brief registration steps. Agree to the terms of use and click Submit.
Set Up Your Exam for Online Proctoring
Important: SmarterProctoring works best when you've already created your exam in Canvas. The following steps should be completed in your Canvas Quiz settings before you copy and import the exam into SmarterProctoring.
Prepare Your Canvas Exam
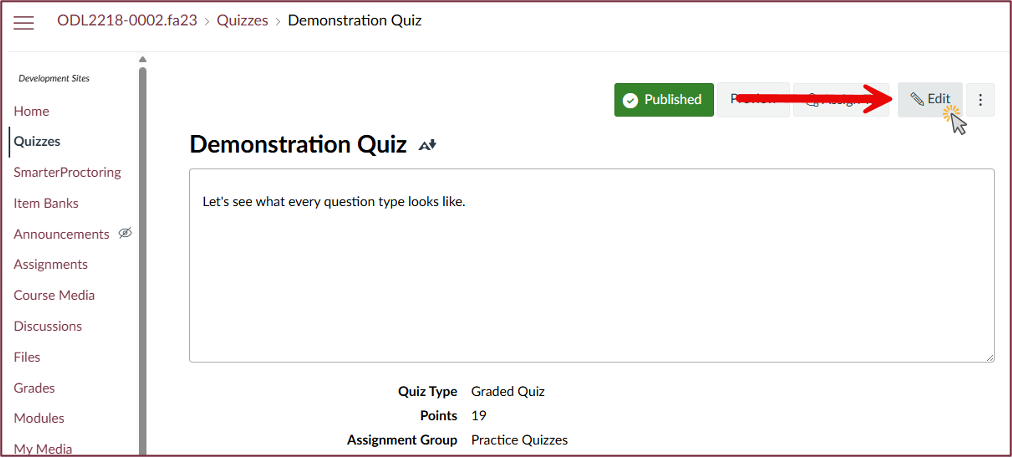
Before importing, ensure your Canvas "Classic" Quiz has the following settings: Click Edit to open the Quiz settings.
-
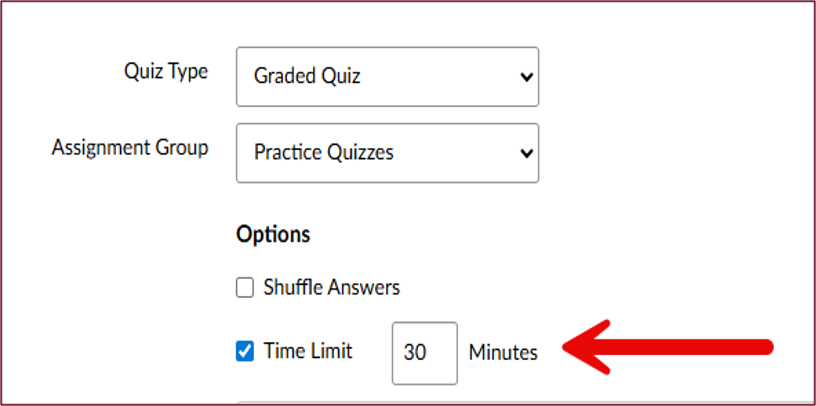
Time Limit: Your Canvas Quiz must have a
time limit.
-
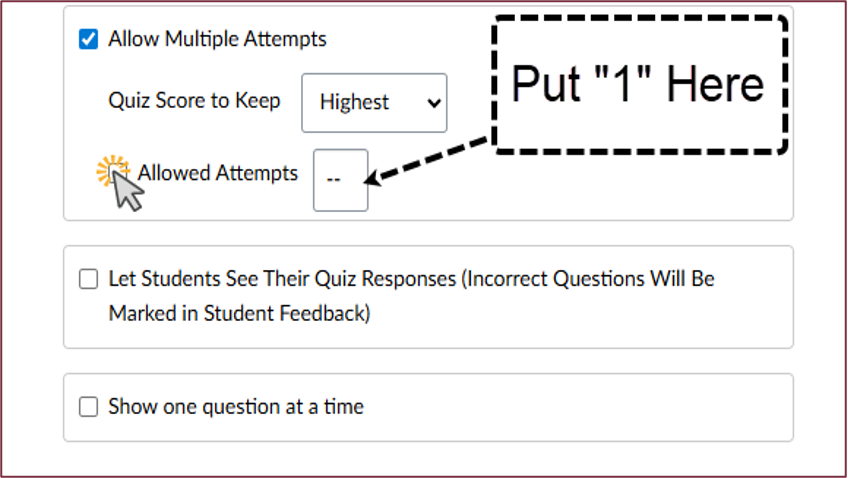
Multiple Attempts: Your Canvas Quiz
must have "Allow Multiple Attempts" selected, even if you
only want to allow one attempt. For one attempt, enter 1 in
the box.
-
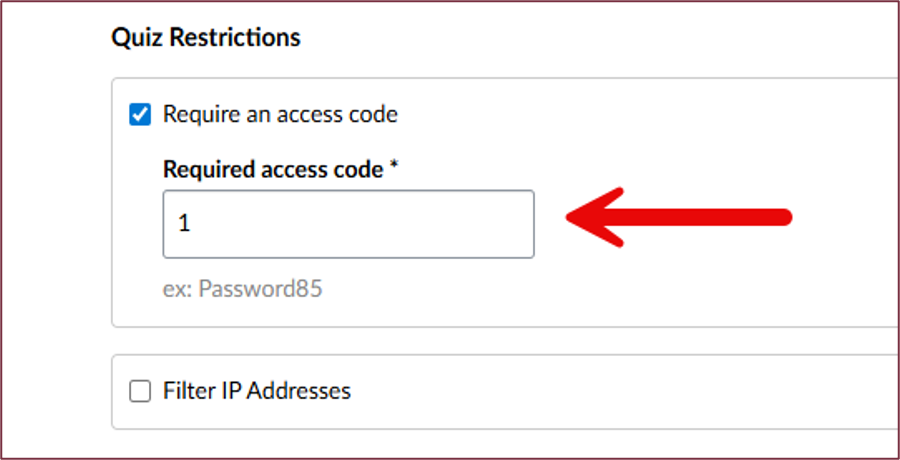
Access Code and IP Address: Your Canvas Quiz
must require an access code. This is critical for security.
Deselect the "Filter IP Addresses" option
and confirm the settings match the example shown below.
-
Important:
Never distribute the password to students.
SmarterProctoring handles it automatically.
-
Important:
Never distribute the password to students.
SmarterProctoring handles it automatically.
- Assign To: The section is directly below the access code settings, and the Quiz must be assigned to "Everyone."
- Availability Dates: Enter the start and end dates for your Exam window as you normally would in Canvas.
Make a Copy of Your Exam
- Review the provided guide on how to copy your current Exam to ensure the copy is identical to the original. Refer to Part 2 of the linked article, "Duplicate the Quiz (Exam)," to ensure a smooth and seamless import process.
- After creating the duplicate quiz/exam, rename it to one of the following options based on your course needs: "FSU Online Proctor," "SmarterProctoring," or "Off-Campus Testing."
- If you need help, contact the FSU ODL Canvas Support Team for step-by-step assistance: Phone: (850) 644-8004 (Mon-Fri, 8 AM-5 PM EST) | Email: [email protected] | Submit a Ticket: support.canvas.fsu.edu/new.
Import Your Exam Into SmarterProctoring
-
Navigate to the SmarterProctoring dashboard on the
left-hand side of the Canvas course menu.
- Click Import Exam. If you've used SmarterProctoring before, select New Exam from the top-left menu instead.
-
Select the relevant quiz from your Canvas course dropdown.
This will pull over the exam name, duration, and the password you set.
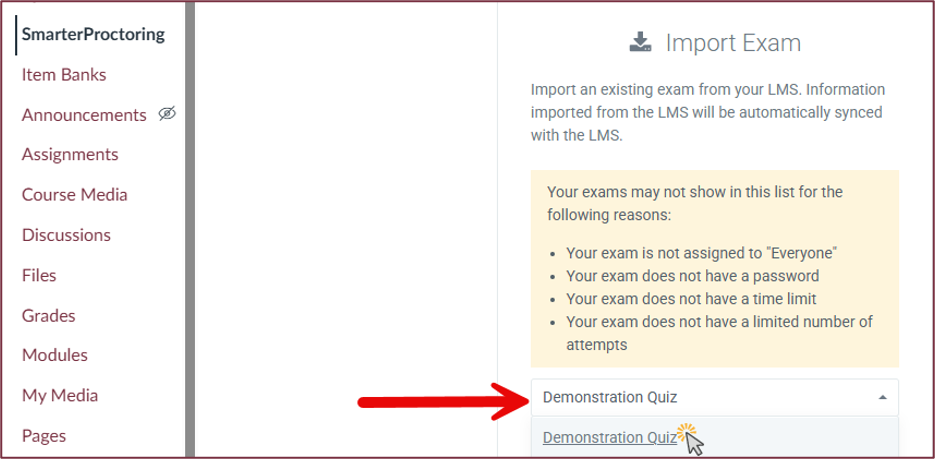
- Click Import Exam.
Note: Any future edits to the exam name, duration, or password must be done in the Canvas exam first, as SmarterProctoring will sync with Canvas.
Exam Settings in SmarterProctoring
To complete the import process into SmarterProctoring, please review and confirm that the following critical details have been configured correctly within the exam settings.
-
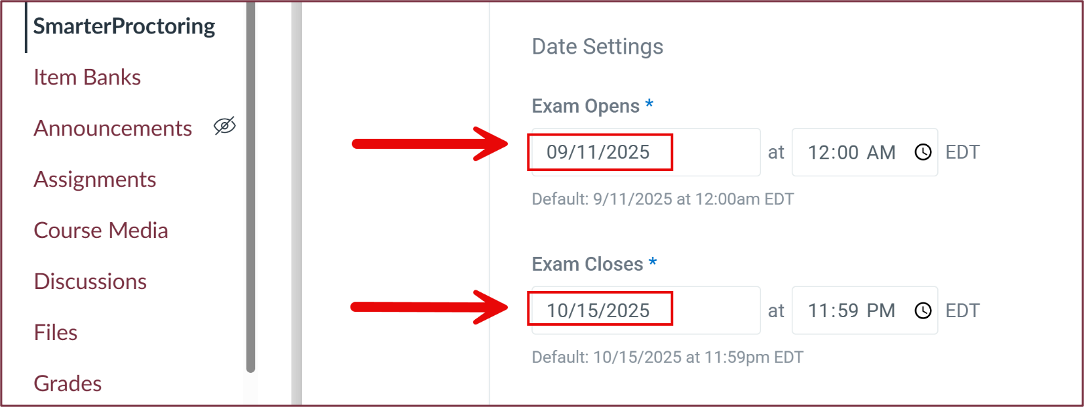
On the Exam Details page, complete all required sections accurately. Then,
select Scheduling Window and enter the time frame for
students to schedule their exams.

Note: It is best to give students 2 weeks to book their exam before the test window opens. Students who miss this scheduling window will not be able to schedule or take the exam. - On the Permitted Items page, select any items you want to allow or prohibit for this online proctored exam.
- On the Notes page, you can add student notes and proctor notes for the SmarterProctoring staff member monitoring the exam.
-
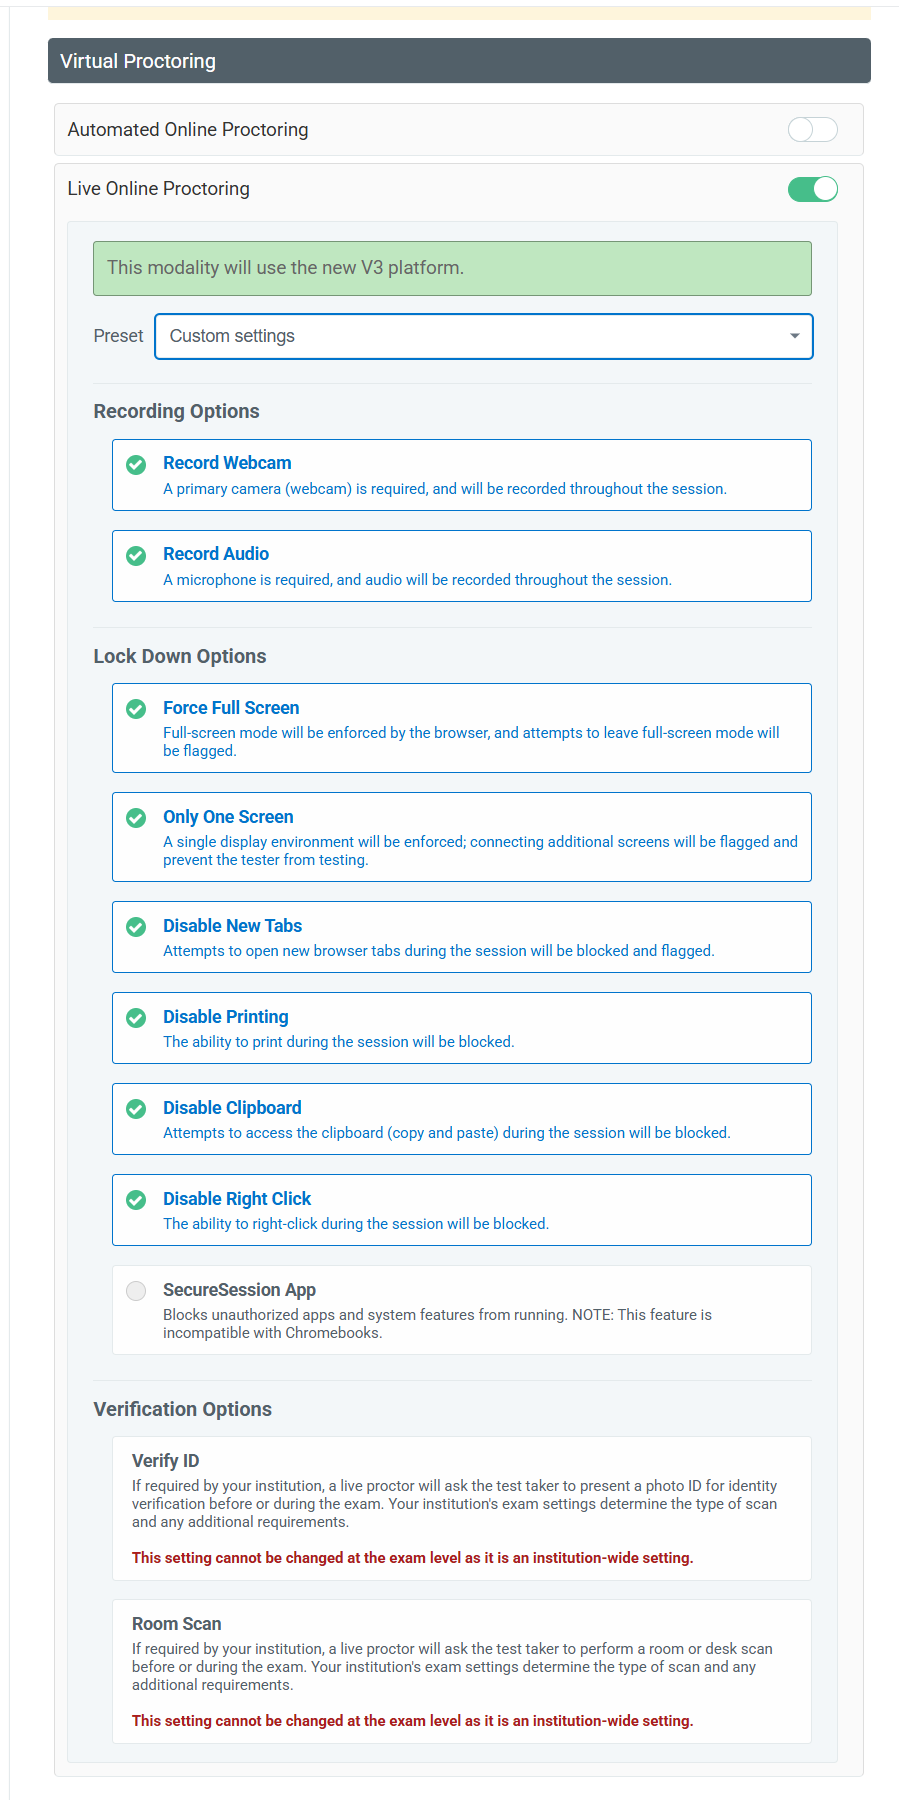
On the Proctor Settings page, select
"Live Online Proctoring." The settings for "Verify ID" and
"Room Scan" are already selected, as the live proctor will handle these
steps.
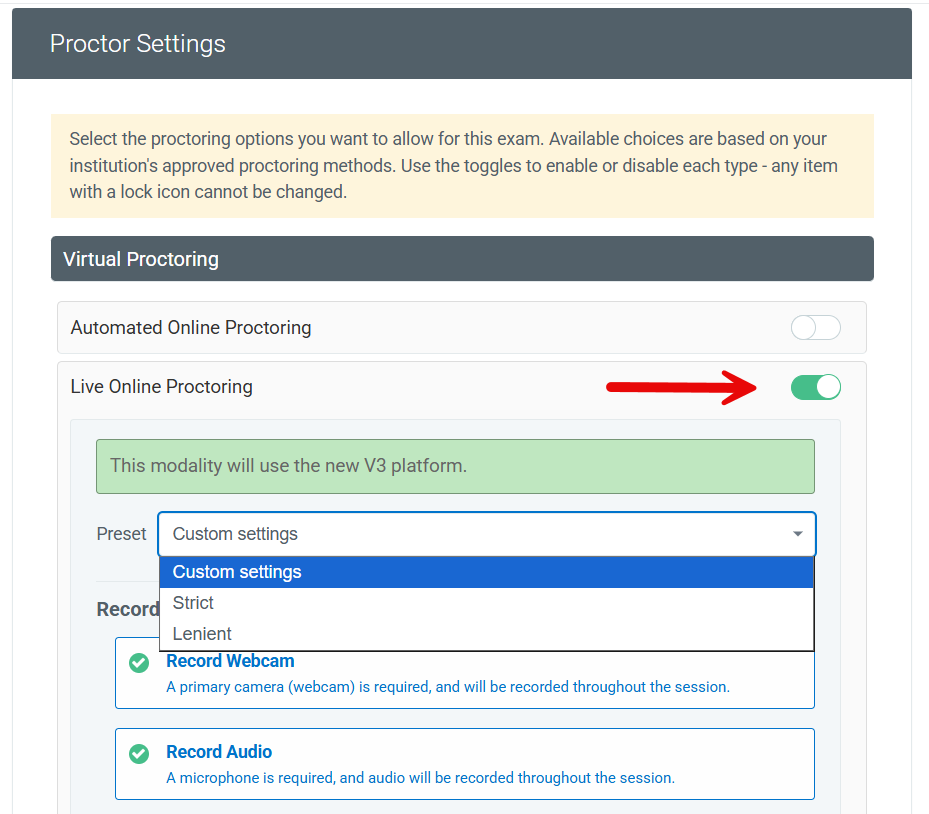
-
Choose from
Custom settings, Strict, or
Lenient depending on your requirements. Then modify any
further Recording Options and/or
Lock Down Options as preferred.
- Once you've reviewed and confirmed that all exam settings are accurate, click Confirm on the bottom-right of the confirmation page.
Approved Accommodations and Exclusions
If a student requires accommodation such as extended time, or any other from of exception, the accommodation must be added to both SmarterProctoring and Canvas before scheduling their appoint. As SmarterProctoring charges by duration, please note that students will not be charged extra for additional time granted due to approved accommodation.
-
In SmarterProctoring:
-
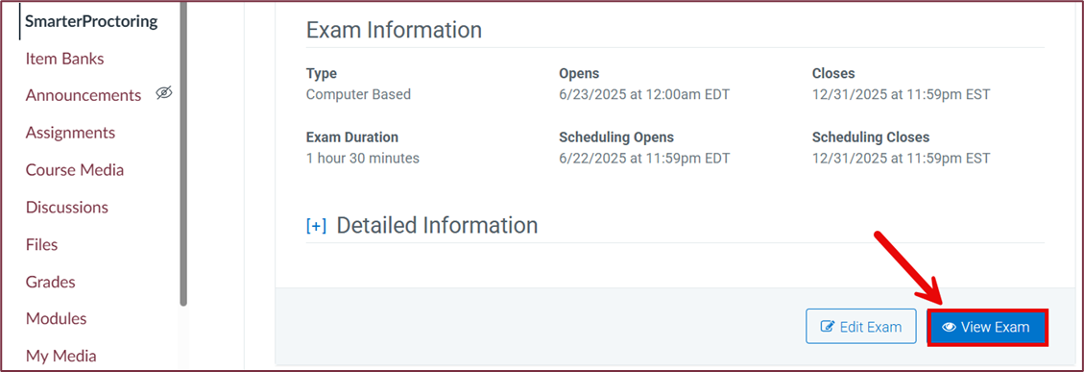
From your exam dashboard, click
View Exam in the bottom-right corner of the screen.
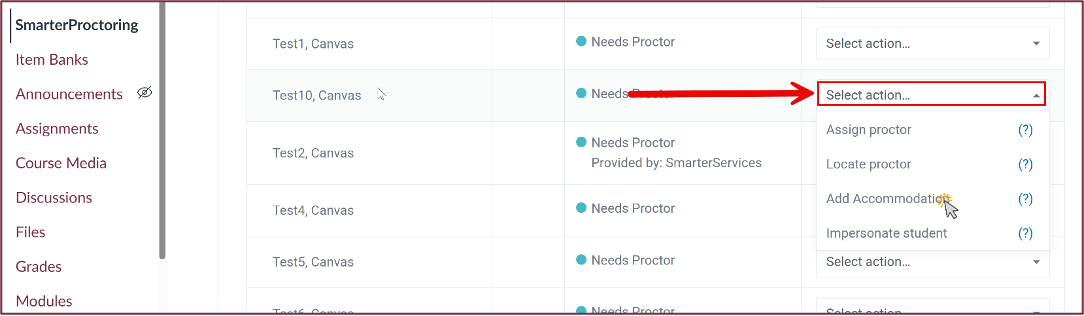
- Scroll down and locate the student in the roster.
-
In the Select Action dropdown next to their name,
choose Add Accommodation and configure the details.
-
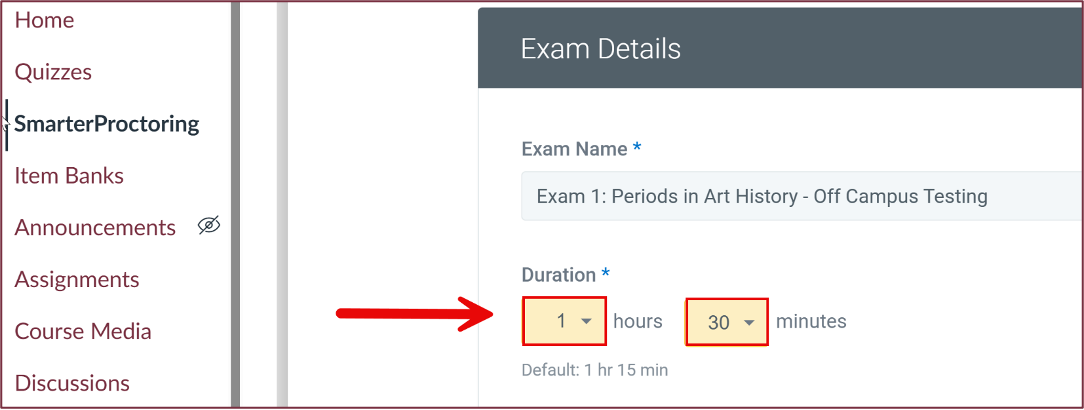
Now you can edit the Exam Details of the student according to their
official accommodations or exceptions, including duration/exam length.
-
Next, you can edit allowed attempts and the length of the scheduling
window.
-
If a student missed the original sign-up period or needs to reschedule,
you can extend the
scheduling timeframe in SmarterProctoring--even beyond
the original exam dates (e.g., for makeup exams)--without adjusting the
overall exam settings.

-
You can also edit the permitted or non-permitted items/actions.
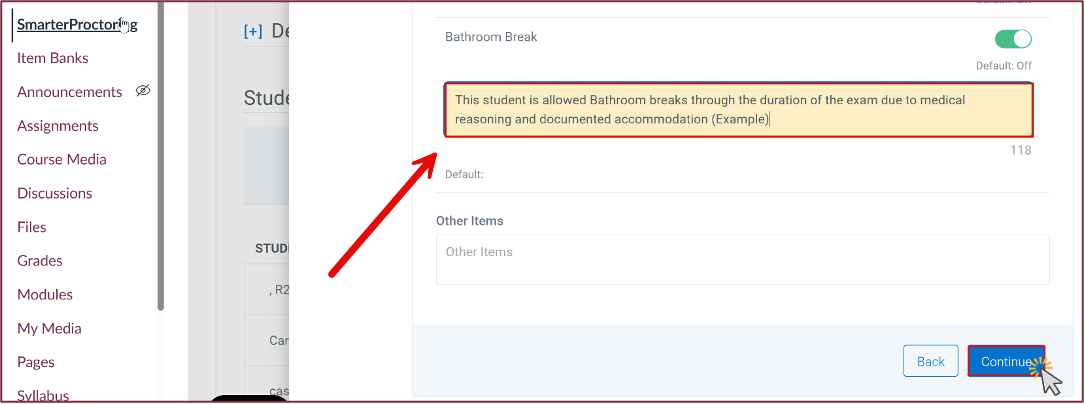
- If no further changes are needed, click Continue to complete the remaining sections--Student Notes, Proctor Settings (be sure to deselect "Verify ID" and "Room Scan"), and Final Confirmation.
-
From your exam dashboard, click
View Exam in the bottom-right corner of the screen.
-
In Canvas:
- Use the Moderate Quiz feature to apply the same accommodation (e.g., extra time).
Monitoring and Reviewing
- View Exam Dashboard: From the SmarterProctoring section in Canvas, click View Exam to see your roster and each student's proctoring action (e.g., "Assign Proctor," "Locate Proctor," "Add Accommodation").
- Reviewing Proctoring Sessions: For completed sessions, you can review recordings and flagged incidents. Go to the student's completed session on your dashboard and look for View Session Details or Review Recording.
Impersonate Student View
Seeing the SmarterProctoring interface from a student's perspective:
- From your exam dashboard, click View Exam.
- Choose any student from the roster.
- From the Action dropdown, select Impersonate Student.
Note: Canvas's built-in "Student View" does not fully replicate the SmarterProctoring experience. Use the "Impersonate Student" feature within SmarterProctoring for an accurate view.
Making Changes to an Exam
From your My Exams dashboard, click Edit exam to modify settings.
Caution: Avoid editing exam details once students have begun scheduling exam appointments as it will force students to reschedule their exam appointment and require them to pay for a new session at the time of scheduling and wait 5-10 business days for the refund of their original appointment.
When making changes to exam details like name, duration, or password, remember to make those changes in Canvas first. If changes are required, please contact the FSU ODL Canvas Support Team for assistance.
Help Services and Support
- Early Communication: Announce proctoring requirements and instructions in your Canvas course site well before the exam.
- Encourage Scheduling: Remind students frequently to schedule their appointments early. Appointments scheduled within 72 hours of the exam session requires an additional fee.
-
Utilize Support:
- SmarterProctoring offers 24/7 chat and email support directly from their dashboard.
- For Canvas-specific issues, contact the FSU ODL Canvas Support Team for step-by-step assistance: Phone: (850) 644-8004 (Mon-Fri, 8 AM-5 PM EST) | Email: [email protected] | Submit a Ticket: support.canvas.fsu.edu/new.


