


 11466
11466
Using Cidi Labs DesignPLUS, you can create a custom Homepage for your Canvas course(s). Creating a course Homepage will allow you to provide your students with the tools necessary to successfully complete your course, while at the same time adding some creativity and visual interest to your course.
Creating a Homepage
To begin creating your Canvas course Homepage:
-
Access the course that you would like to create a homepage for by clicking
on the Dashboard icon in the Global Navigation Menu, or by
clicking on the Courses icon in the Global Navigation Menu
and then click the All Courses link.

- Click on the desired course.
-
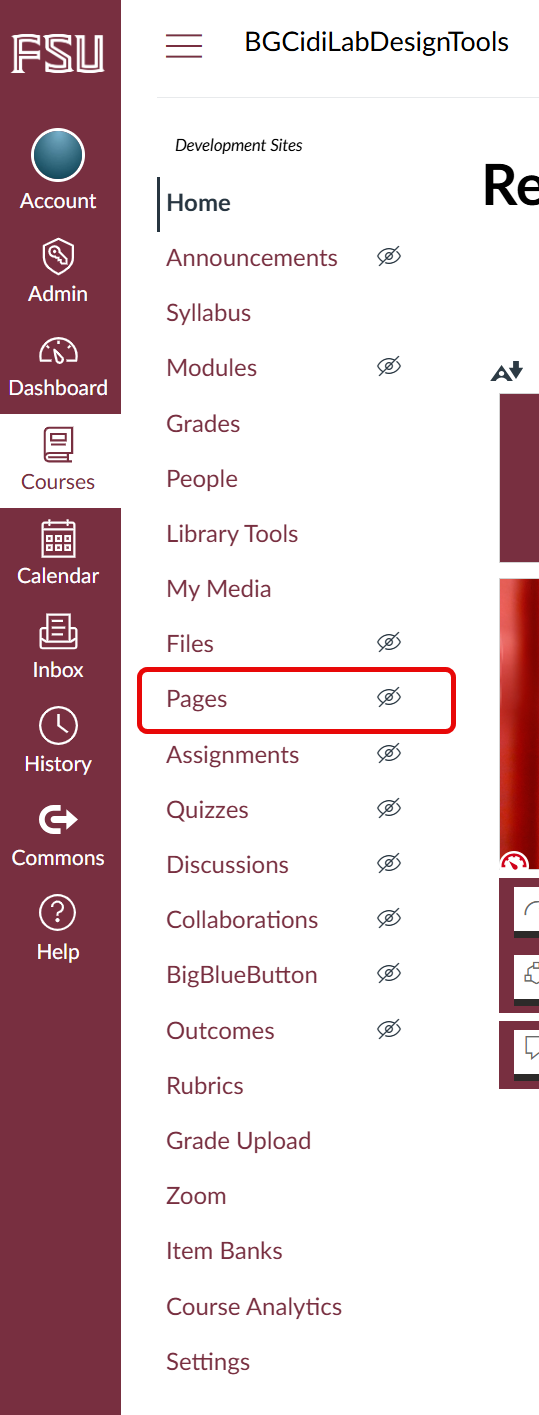
On the Course Navigation Menu, click Pages.
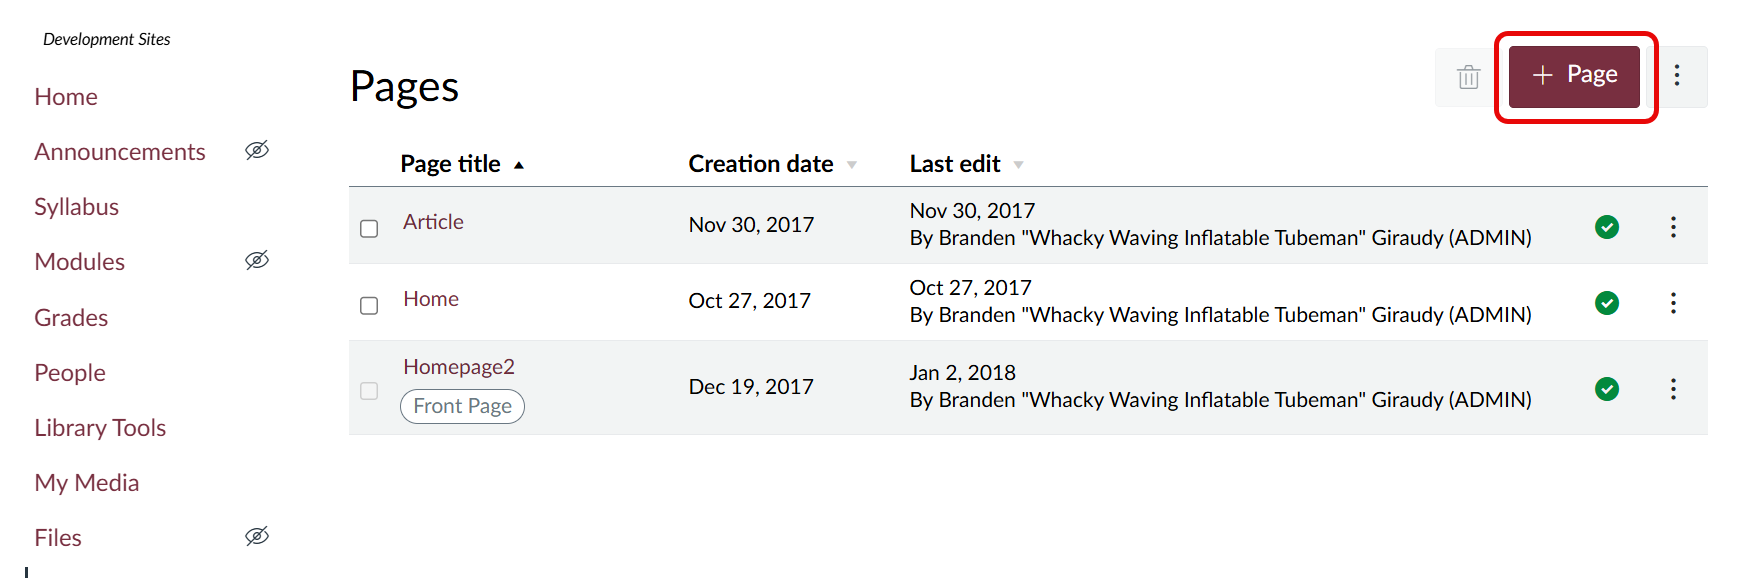
-
Create a page by clicking on the + Page button in the
upper-right hand side of the screen.
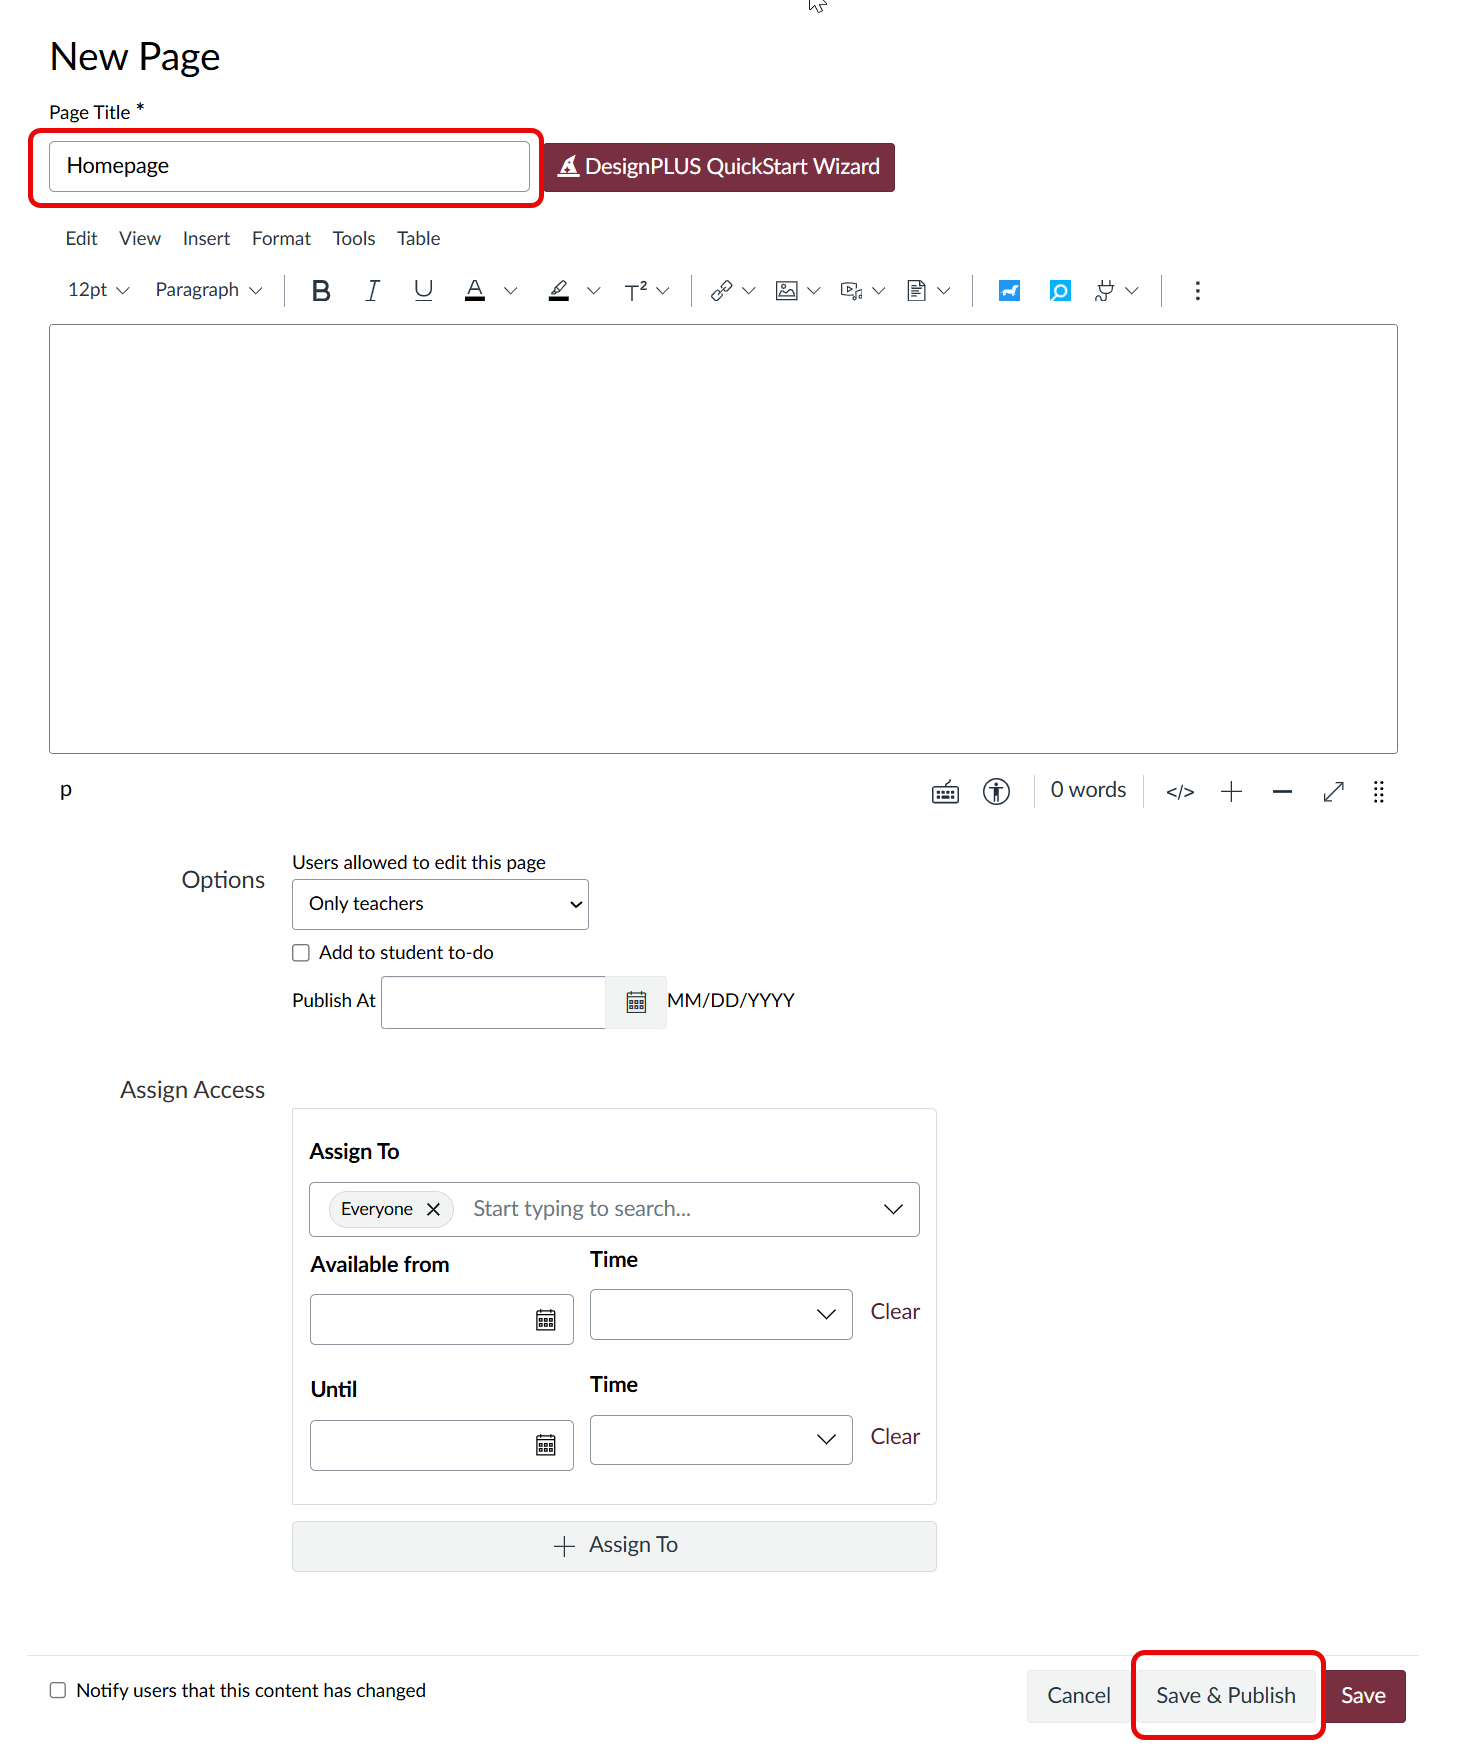
- Name the page "Homepage".
-
Click Save & Publish.
Once you have created your "homepage," you can begin using DesignPLUS:
-
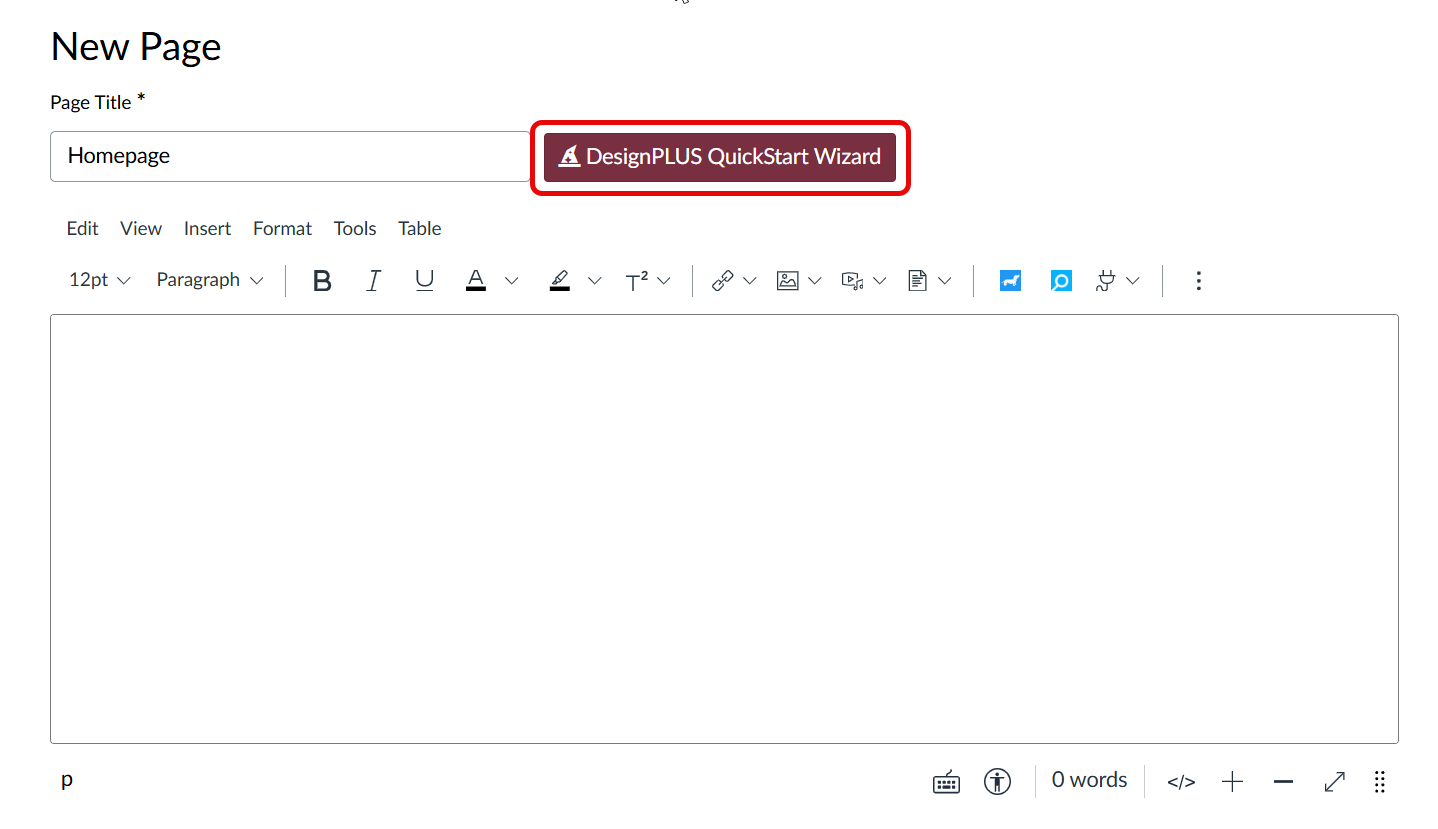
Click on the QuickStart Wizard icon to launch the wizard
and access the DesignPLUS templates.
- Select which Home Page template you prefer in the Wizard Preview window and "Add to Editor" once you have chosen the template.
- You can now "Save & Publish" the page, or make further changes using the DesignPLUS sidebar.
-
Click on the rocket ship icon that will appear in the top-right corner of
the screen.
Quick Tip: If you prefer using keystrokes, you can use the keyboard shortcut Alt-Shift-D to access DesignPLUS
You should now have Cidi Labs DesignPLUS available for use, with all of its features listed on the right-hand side of the page.
Selecting a Theme
By default, there are a number of preset institutional themes that you can select. Once you have DesignPLUS open, you can update the theme using the following steps:
-
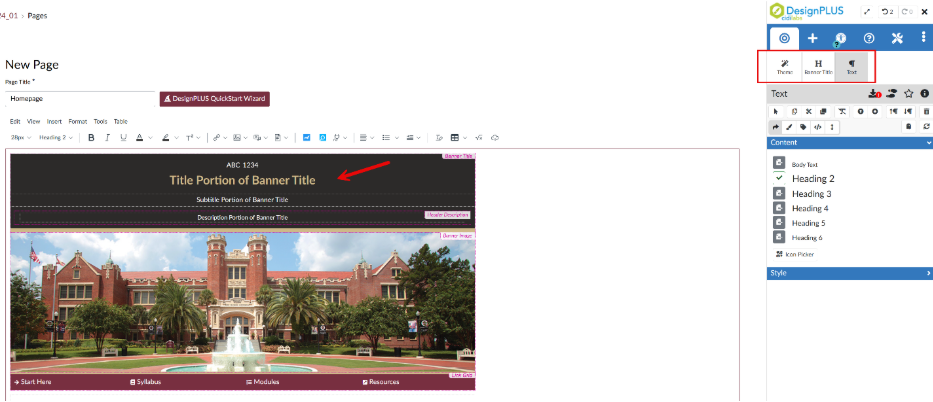
Inside the RCE, click inside the top portion of the page, the "Banner Title"
section and you will see "Theme," "Banner Title," and "Text" as options to
edit in your sidebar.
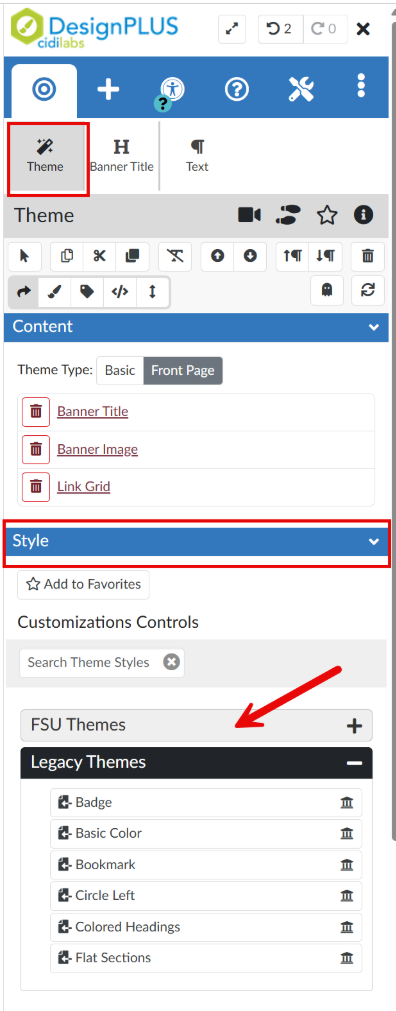
-
Click Theme and under Style you will see
different options to style your page with the FSU institutional themes
available. There are FSU Themes (newer) and Legacy (original) Themes
available.
Adding Banner Text
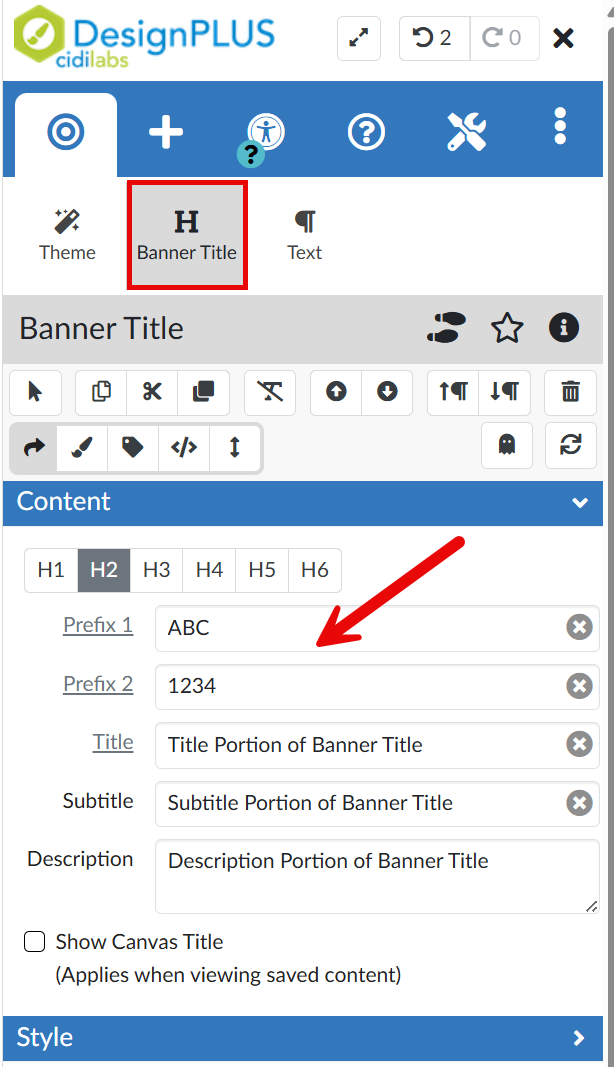
To update the information on your home page, select Banner Title and type in your course name, number, and any other information directly into the DesignPLUS sidebar.
To upload a Banner Image:
-
Click Files on the Course Navigation Menu.

-
Click the Upload button in the upper right of the
screen.

-
Select the image you would like to upload.
Quick Tip: It helps if the aspect ratio (height to width ratio) of the image is about 1100 x 313 pixels or so.
Return to your page that you have created, and access DesignPLUS:
- Click Pages on your Course Navigation Menu.
- Select the "Homepage" page.
- Click the Edit button.
- Click the Rocket Ship icon in the upper right corner of the screen, or use the keyboard shortcut Alt-Shift-D.
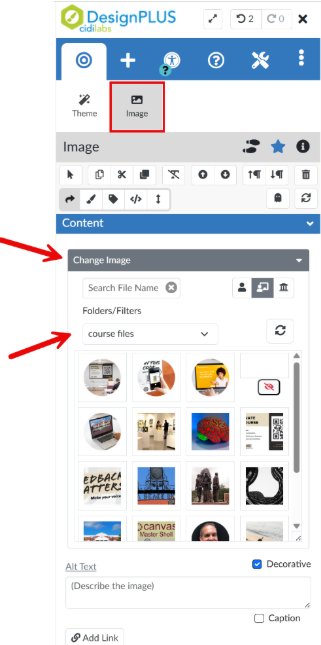
To place the Banner Image you've uploaded into your Homepage:
- Click inside the Banner Image in the RCE.
- Be sure you are editing the "image" in the DesignPLUS Sidebar.
-
Select Change Image and select the image you uploaded from
your course files.
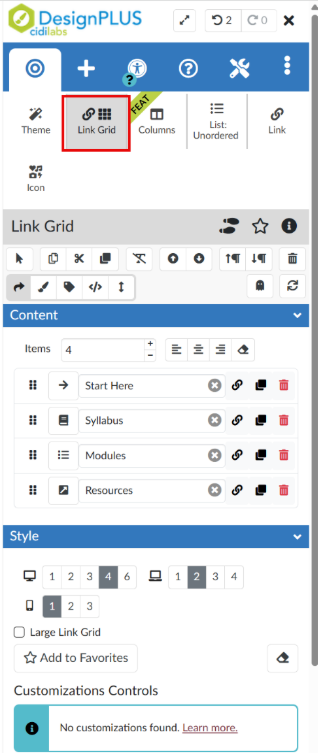
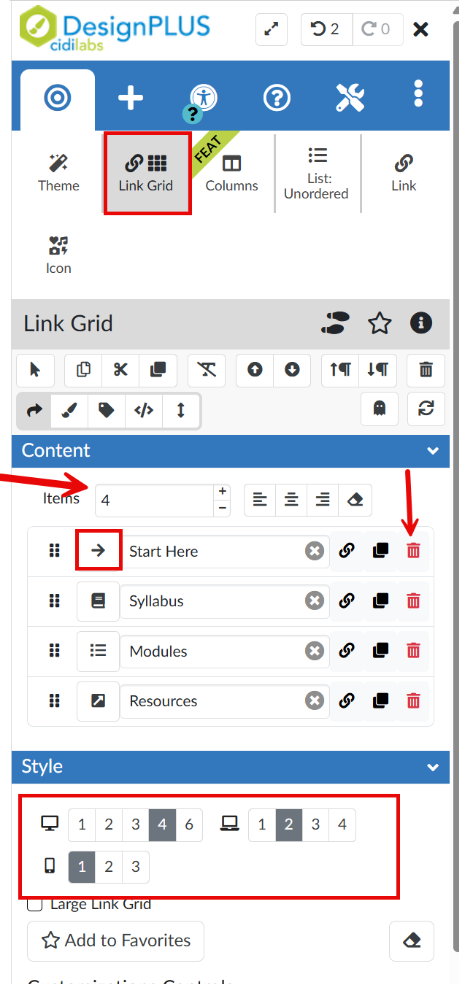
Add/Edit the Navigation Links
By default, you should have four course links on your home page.
To add or edit the links that appear in your course home page:
- Click Edit and then click on the Rocket Ship, or use the keyboard shortcut Alt-Shift-D.
-
Click inside the link grid in the RCE and be sure you are editing the
Link Grid in the DesignPLUS Sidebar.
-
While editing the Link Grid you can adjust the number of
links, the icons, the link titles, and the layout. You can use the
track can icon to delete any links you may not need.
To make this Navigation item a link:
- Place your mouse cursor where the navigation item is located and click on it.
-
Click the Link to URL icon that's located in the Rich
Content Editor.

-
Copy/Paste the link and then click the
Update Link button.

Making a Page the Front Page
To make this Homepage the Front Page for your Canvas course:
- Click the Pages link located in your course navigation.
- Click View All Pages.
- Locate the Homepage you created on this list.
- Click on the Gear icon to the farthest right on the row where your Homepage is located.
-
Select Use as Front Page.

If in the event that you don't see the Home Page that you created as your Front Page:
- Click on the Home button in your course navigation.
-
Click the Choose Home Page button located on the far right
of the page.

-
Select the Pages Front Page option and change the page to
the Course Home Page that you designed.

When you click on Home, and any time you access your page, you should be redirected to the Homepage that you have created.


