

Using Lucid in Canvas Assignments

Mar 24, 2026
 158
158
Add a Lucid Assignment
Follow the steps below to utilize Lucid in your course assignments. Check out our Lucid Overview article for more resources regarding using Lucid in Canvas.
-
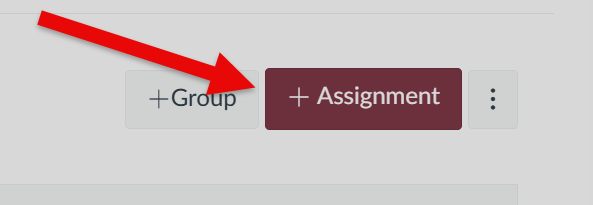
In the Assignments option in your Course, select
+ Assignment on the top-right of the window to create a new
assignment.
-
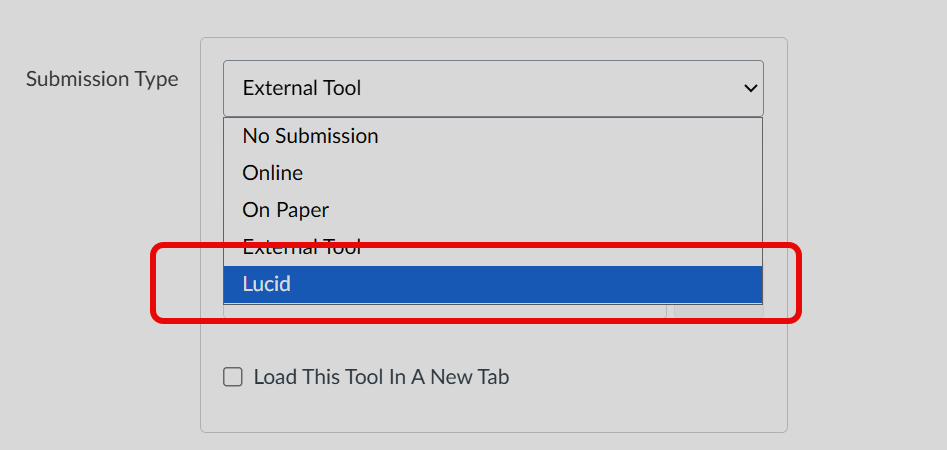
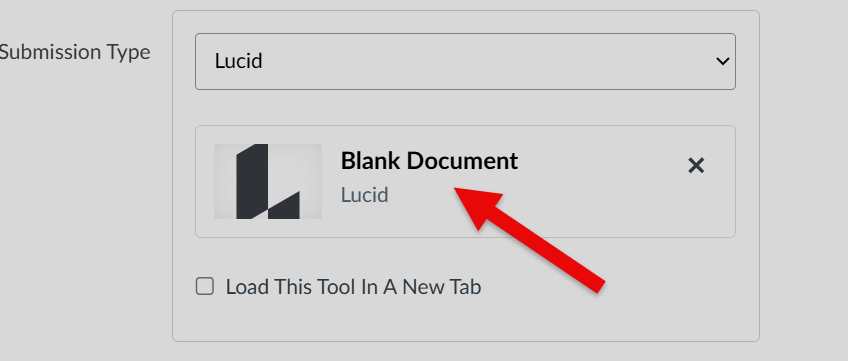
Under Submission Type activate the drop-down list and
select Lucid. You can either load this tool in a new tab by
checking the box under the dropdown, or leave it as an iframe.
-
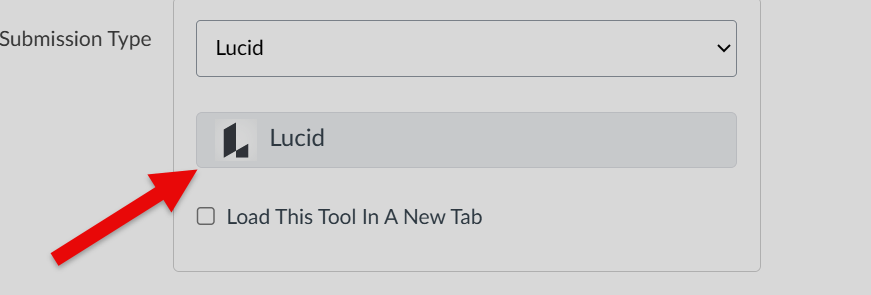
Select the Lucid widget after specifying the submission type.
-
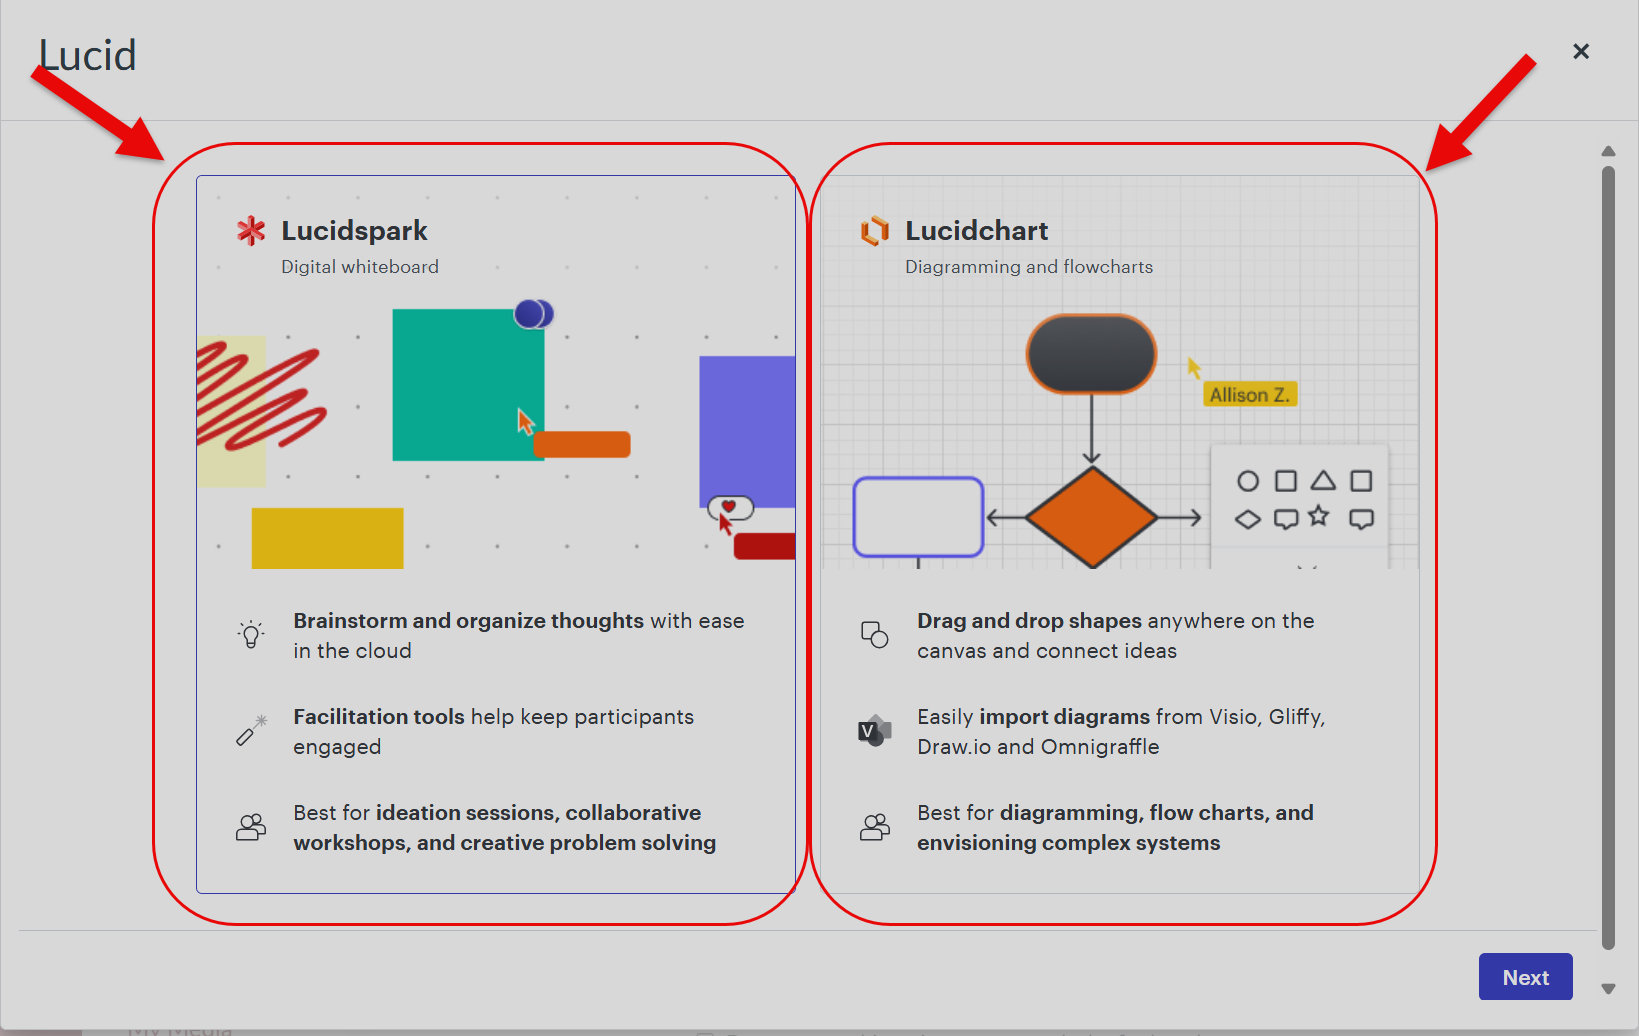
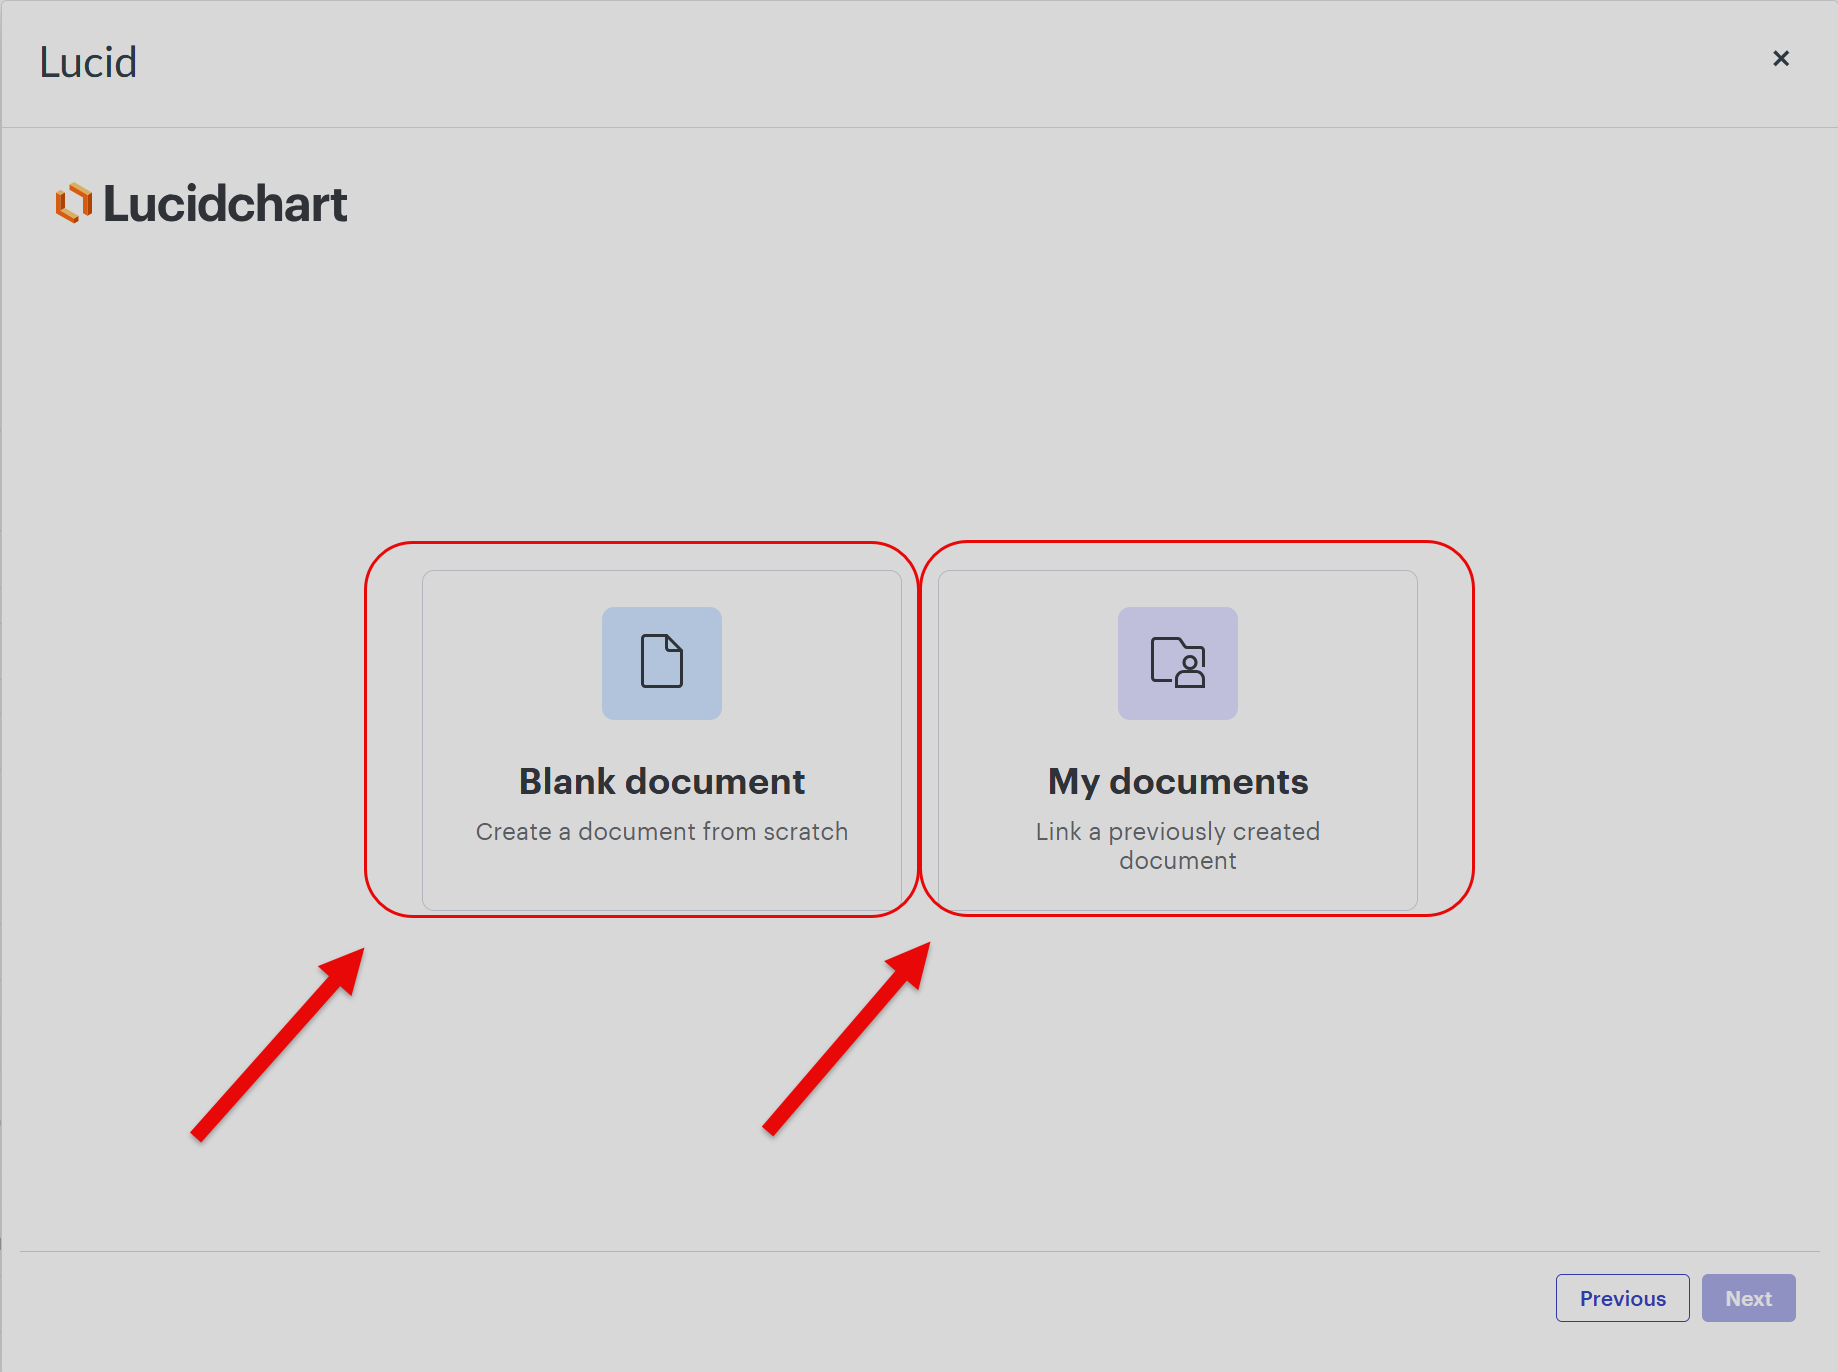
This will open up an iframe that connects to your Lucid account. From here,
you can choose your layout style: Lucid Spark, a more
whiteboard-style collaboration, or Lucid Chart, a more
diagramming and flowchart-style collaboration. Choose and select
Next.
-
Next, you can either create a blank workspace or choose from your library of
existing Lucid documents. Select Next when done.
-
Selecting Blank document will populate a blank workspace,
allowing students a free space to complete their assignment(s).
-
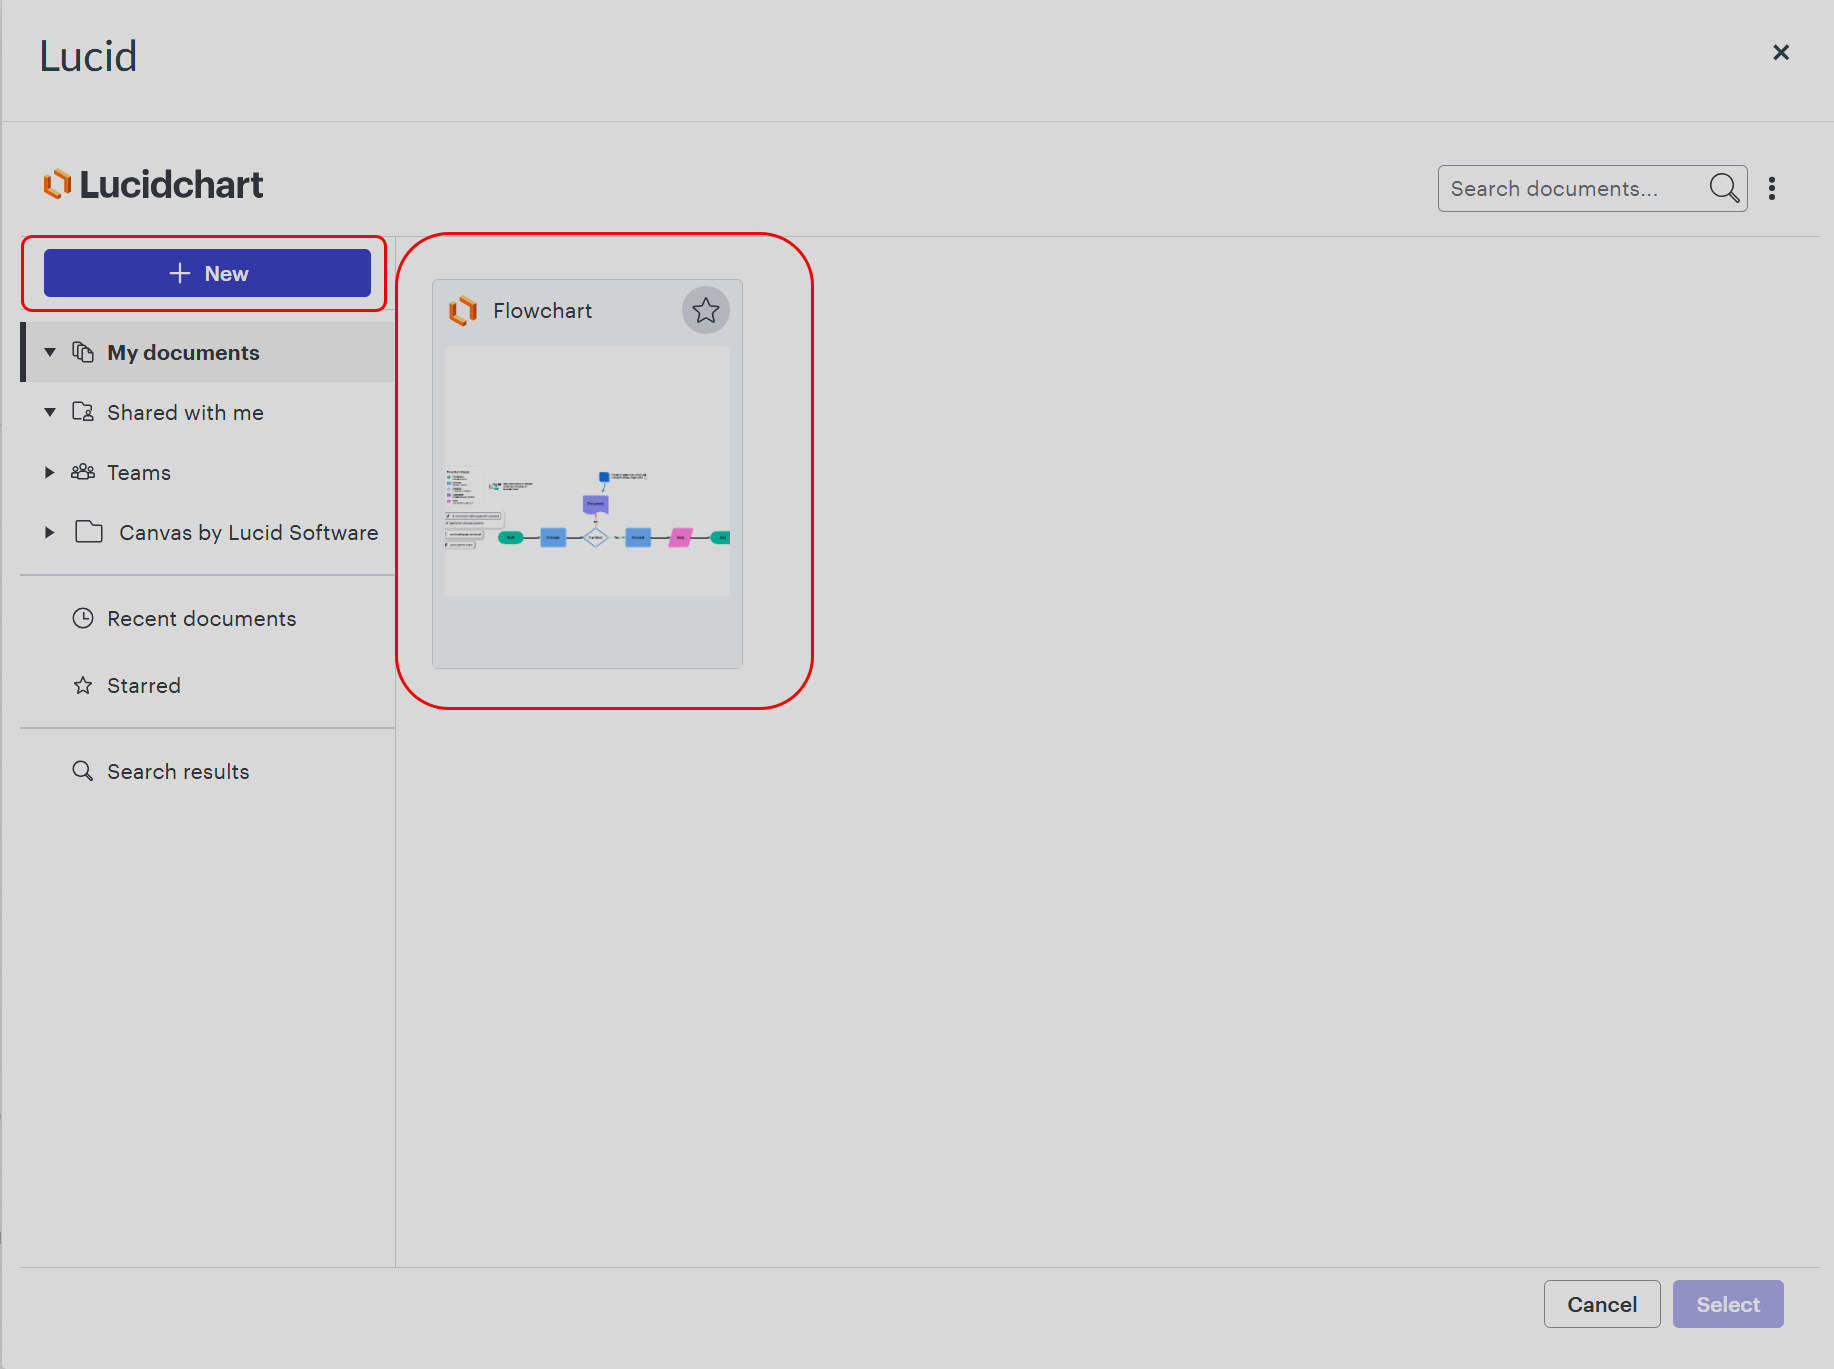
Selecting My Documents will allow you to choose from a
library of your previously existing Lucid documents. Selecting
+New will allow you to either start a new document or
choose from an existing template, acting as an iframe with the capacity to
choose an assignment, but not edit the document.
-
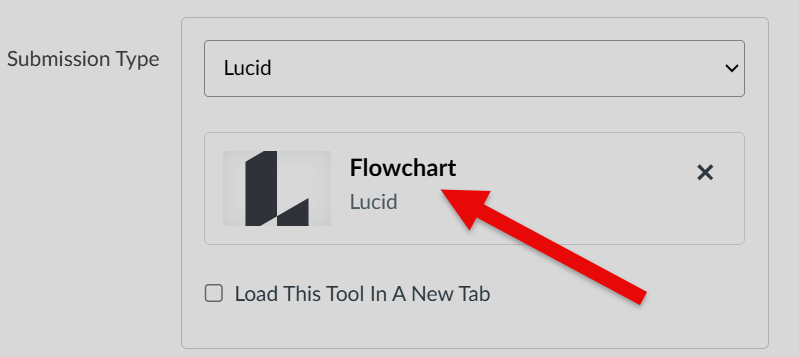
Once selected, the document will appear under Submission Type
- Finally, complete your assignment parameters in Canvas and you're ready to host your Lucid assignment for your course!


