


 5426
5426
Looking to improve your course’s Ally Accessibility Score? These four fixes are relatively quick and easy and help you get started on your path to more accessible course content.
1. Delete/Remove Old Files
We know removing old and unused files from your course can be a little scary at times, but nothing is easier when it comes to improving your overall course score than purging these old – and often inaccessible - files from your course. If you do not have the original files saved elsewhere, you can always download them before removing them from your course.
Note: Any file in your Canvas course will be scored for accessibility, whether it’s published or not.
2. Image Missing a Description
This may seem like an easy fix, and that’s because it is! But being an easy fix doesn’t make it any less important! Any student using assistive reading technology, such as a screen reader, relies on accurate and informative image descriptions to convey what a picture shows. When writing an image description, it is imperative not to simply insert an image title. An image description should provide a textual alternative to the image so that people with visual impairments can have an equivalent experience. Descriptions also make it easier for all students to connect the image with the context.

Note: Missing Descriptions can occur for standalone images or within a document.
3. Document Does Not Have Headings
This one can sometimes be tricky, because a "heading" isn't always a heading. Too often, we associate increased text size with headings, when in reality, a heading should be created using a program’s (Word, PPT, etc.) styling resources. To add headings to a document:
- Download your document and open it.
- Select the text you want to make a heading.
- Select Home (in any MS Office product) and then choose the heading you want from the Styles group.

Note: You may modify some aspects of the styling, such as removing preset colors, once you have applied the heading to the text. - Save the document with correctly created headings.
- Upload that new file to your course.
If the document with missing headings is a PowerPoint presentation, the process can be slightly more complex, but the easy-to-follow directions provided by Ally can help you along the way.
4. This Document is Missing a Title
We told you they would be quick and easy! More often than not, documents are simply titled the same thing as the file name. The problem with that practice is that the file name is usually not very descriptive and can even have no meaning to anyone except the author. This visibility makes it easier to distinguish multiple documents before diving in. Title visibility makes navigation easier for all students. To add a title, you’ll need access to the original document. If the document is a Microsoft document, you simply:
- Click File.
- Click Info from the left-side navigation panel.

- Under the Properties section on the right-hand side, enter the title in the empty text box.
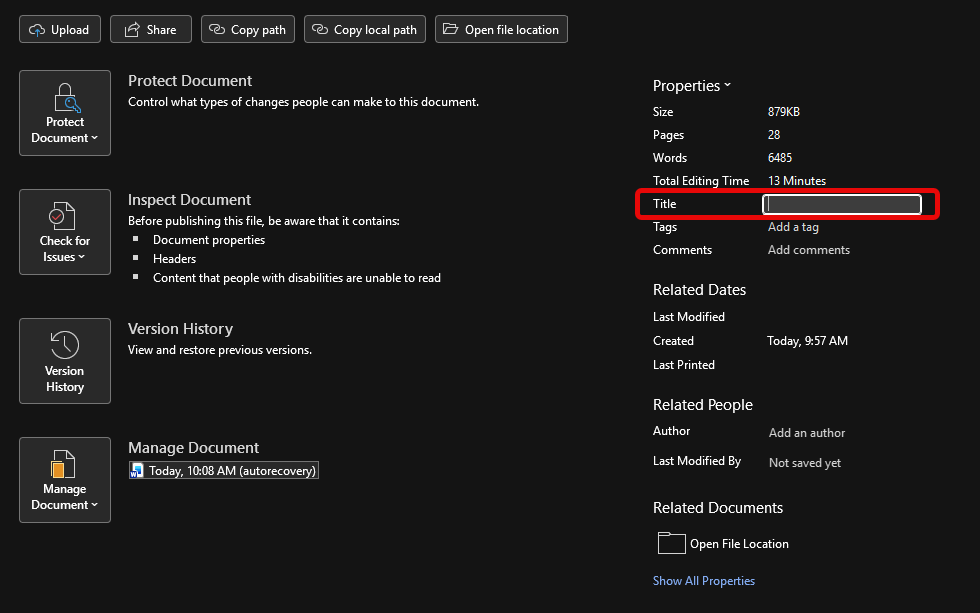
- Save the file.
- Upload the saved file to Canvas
5. Bonus Fix: Working with PDFs
While the first four were relatively quick and easy, working with PDFs can be a bit more involved. If the PDF is yours and you have the original document, simply follow the steps provided when you click the Ally accessibility meter to make updates, then re-upload to Canvas. It becomes trickier if the PDF is scanned and you do not have the original. But don’t worry, we have help for those, too! The first and best solution would be to contact Library Resources to determine whether they have access to the original document. Librarians are available to help you find and link to the original and accessible document. This also helps avoid any copyright issues. If that isn’t possible, another potential solution would be to use Adobe Acrobat’s Export To feature. This feature allows you to export a PDF to Microsoft Word, PowerPoint, an HTML webpage, and more.


